10 Best Lingerie Model Poses for E-commerce Shooting (2026)
Make lingerie product photos more flattering and informative with 10 poses that showcase fit, fabric, and key details — plus an AI alternative to costly photoshoots.


Flat product photos show what lingerie looks like—but not how it fits, sits, or looks on a body. For e-commerce sellers, that makes on-model images essential.
The right pose does more than make a product look attractive. It helps shoppers evaluate fit, silhouette, construction, fabric, and key design details before they buy.
This guide covers 10 lingerie model poses for e-commerce, including what each pose shows, which products it works best for, where to use it in a listing, and its limitations. It also covers practical camera angles and an AI alternative for creating on-model visuals without a full photoshoot.
Key Takeaways
Best for fit: Straight-on stand — shows the garment's true front fit and silhouette.
Best for back details: Over-the-shoulder glance — highlights straps, closures, and lace-back details.
Best for shape: 3/4 hip shift — adds dimension while keeping much of the garment visible.
What matters most: Choose poses that help shoppers understand fit, construction, and fabric—not just create a mood.
For high-volume sellers: AI try-on can create additional on-model variations from existing product images, reducing the need for a full photoshoot for every SKU.
Quick Comparison: Lingerie Model Poses at a Glance
| Pose | What It Shows | Best Product Types | Use It On | |
| 1 | Straight-On Stand | True fit & silhouette | Everyday bras, briefs | Product page main image |
| 2 | Hip Shift (S-Curve) | Curves & side profile | Bodysuits, shapewear | Gallery image |
| 3 | Over-the-Shoulder Glance | Back details, straps | Back-detail bras, bralettes | Gallery + social |
| 4 | Hand-on-Hip Stance | Waist definition | Shapewear, sets | Gallery image |
| 5 | Wall Lean | Relaxed fit, lifestyle | Sleepwear, robes | Social + ads |
| 6 | Seated Edge Pose | Both pieces in one frame | Matching sets | Gallery image |
| 7 | Side Recline | Drape & side seams | Slips, chemises | Lifestyle gallery |
| 8 | Propped-on-Elbows Recline | Playful full-body look | Babydolls, rompers | Social + gallery |
| 9 | Arms-Overhead Stretch | Lengthened silhouette | Camisoles, bodysuits | Social + ads |
| 10 | Detail Framing Close-Up | Lace, embroidery, hardware | Lace bras, chemises | Zoom/detail image |
10 Best Lingerie Model Poses
1. The Straight-On Stand — For True Fit and Silhouette
The model stands facing the camera with feet hip-width apart, shoulders relaxed, and arms naturally at her sides. Keep the weight evenly distributed and avoid crossing the legs so the fit and silhouette remain easy to judge. Hold the arms slightly away from the body to keep the underbust and side seams visible, with the chin level to the camera for a clean, catalog-ready view. This pose works especially well for everyday bras, briefs, and other pieces where accurate fit is important.
💡 Pro tip: Shoot the straight-on stand first. It sets the standard for fit, and every other pose in the gallery gets judged against it.
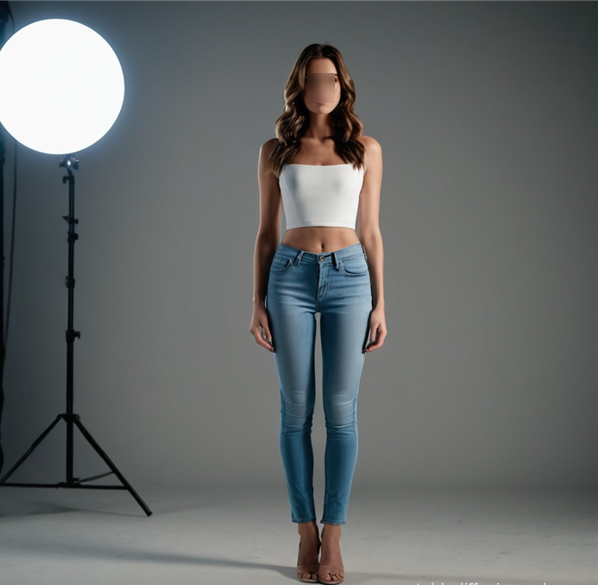
2. The Hip Shift (S-Curve) — For Curves and Side Profile
The model shifts her weight onto one leg and pushes the opposite hip out, creating the classic S-curve. Shot at a 3/4 angle, one of the most versatile poses for showing both shape and side profile and the backbone of most fashion catalogs.
How to direct it:
Weight on the back leg, front knee soft, hip angled slightly toward the camera.
Turn the torso 3/4 while the hips stay more frontal — the twist is what creates the curve.
Keep the front arm relaxed, hand resting near the thigh.
3. The Over-the-Shoulder Glance — For Back Details and Straps
The model faces away from the camera and turns her head to look back over one shoulder. This pose is especially effective for lingerie with back details, straps, or closures, which are often key design elements of bras.
For the best angle, keep the back fully facing the camera and rotate only the head toward the lens rather than turning the torso. Keep the chin slightly down and the eyes looking up to create a flattering angle while maintaining an elegant neckline. One hand can rest on the opposite shoulder or hip to keep the arms from distracting from the back details.
This pose works best for back-detail bras, strappy bralettes, and pieces where the straps or closure are a key selling point. Because it completely hides the front design, pair it with a front-facing shot in the same gallery for a more complete product view.
4. The Hand-on-Hip Stance — For Waist Definition
The model stands at a slight angle with one hand resting lightly on the hip or waist, creating a natural frame around the waistline. Keep the fingertips light on the waistband rather than using a flat palm, and point the elbow slightly back to keep the upper body open. Angling the hips slightly away from the camera can create a more flattering silhouette. This pose works especially well for shapewear, corsets, high-waist sets, and other pieces where waist definition is a key selling point.
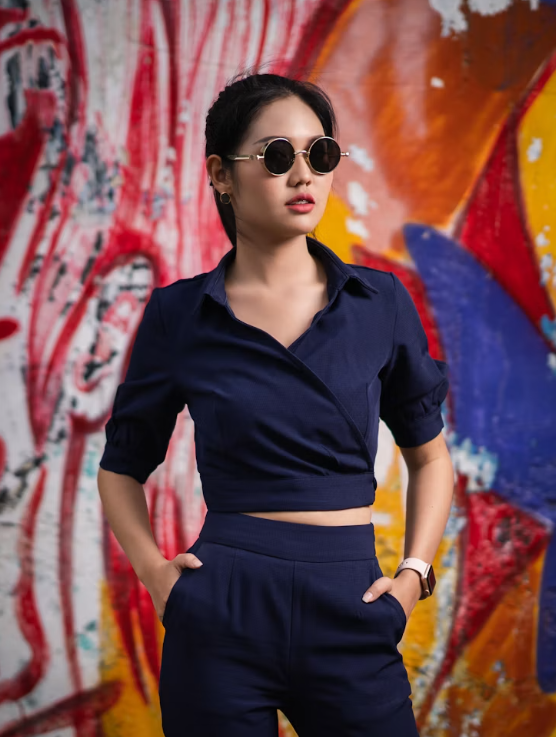
5. The Wall Lean — For Relaxed Lifestyle Imagery
The model leans back against a wall or doorframe, one knee bent with the foot flat against the wall, hands relaxed. It reads as lifestyle rather than catalog — ideal for sleepwear and social content.
How to direct it:
Shoulders on the wall, hips a few inches off it, so the torso stays visible.
One knee bent, foot flat on the wall — never a deep lounge that wrinkles the garment.
Shoot at eye level or slightly below to keep proportions natural.
6. The Seated Edge Pose — For Full Sets in One Frame
The model sits on the edge of a stool or bench, back straight, legs extended or crossed at the ankle. Seated poses put both pieces of a set in one clean frame.
How to direct it:
Sit tall on the edge of the seat — slouching shortens the torso and wrinkles the waistband.
Cross at the ankle rather than the knee for a longer, cleaner leg line.
Hands resting lightly on the thigh or the seat edge.
7. The Side Recline — For Slips and Draped Fabrics
The model lies on her side, propped on one forearm, with the lower leg bent. Reclining poses let draped fabrics fall naturally — exactly what you want for slips and chemises.
How to direct it:
Prop on the forearm with the elbow under the shoulder, torso at a gentle diagonal.
Bend the top leg slightly over the lower leg for a soft, lengthened line.
Smooth the fabric over the waist before the shot so it doesn't crease.
8. The Propped-on-Elbows Recline — For Playful, Warm Imagery
The model reclines on both elbows, back at an angle, chin lifted. It reads warm and relaxed without losing the product — a strong fit for lifestyle-oriented brands.
How to direct it:
Elbows planted behind, chest open, chin level — this keeps necklines and cup shapes visible.
One knee bent, the other leg extended, for a diagonal line through the frame.
Shoot from slightly above eye level for a flattering angle that hides nothing.
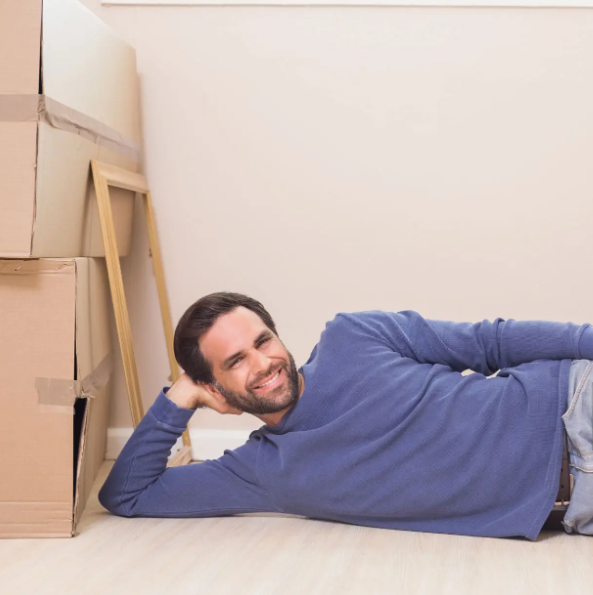
9. The Arms-Overhead Stretch — For Silhouette and Side Construction
The model raises both arms, with hands touching or one hand resting in her hair. This lengthens the torso and reveals the underbust, side seams, and waistband. Keep the elbows slightly soft and forward, and shift the weight onto one hip for a natural line. Avoid fully locking the arms or covering the torso with both hands. This pose works well for camisoles, bodysuits, and longline bras where side construction is important, but pair it with a relaxed straight-on shot because stretching can change how the fabric fits.
10. The Detail Framing Close-Up — For Lace and Craftsmanship
The model uses her hands to frame key details such as lace, embroidery, or clasps, keeping the focus on texture and craftsmanship. Crop tightly so the feature fills the frame, with fingertips placed beside rather than over the detail. Side lighting can help bring out lace and embroidery texture. This works especially well for detailed lingerie where craftsmanship is a key selling point, but should be paired with full-body shots to provide fit and context.
Lingerie Posing Tips: Flattering Angles for a Lingerie Photoshoot
The pose is half the image; the angle is the other half. These lingerie posing tips cover the angles that flatter most.Shoot slightly above eye level
A camera a few inches above the model's eye line flatters the jaw and keeps the viewer's focus on the garment rather than the face. It also avoids the distortion you get shooting upward at close range.
Make the 3/4 turn your default
A dead-on front view is flat; a full profile hides half the garment. The 3/4 turn — torso angled between the two — shows fit, side seams, and shape at once. It's the most versatile angle in lingerie photography.
Light from the side to reveal fabric
Side or angled light can help reveal texture in lace, embroidery, mesh, and trim, while soft frontal light can provide a cleaner, more even product view.
Give the hands something to do
Hands at the sides can look stiff in some poses. Giving the hands a simple, intentional position can make the pose feel more natural while keeping attention on the product.
How to Choose the Right Lingerie Model Poses for Your Catalog
You don't need all ten poses for every product. Match the pose to the product's selling point:
Fit-first products (everyday bras, briefs, shapewear): straight-on stand + hand-on-hip stance + detail close-up.
Design-first products (lace sets, back-detail bras): over-the-shoulder glance + hip shift + detail close-up.
Lifestyle products (sleepwear, robes, babydolls): wall lean + side recline + propped-on-elbows recline.
A practical starting point is 4–6 images per listing, depending on the marketplace and product — one front shot for fit, one back shot for construction, one detail shot for craftsmanship, and one lifestyle shot for emotional context. And complete, consistent image sets tend to outperform sparse galleries — Shopify's guide to ecommerce photography covers the basics of building one.
📌 Note: Marketplace rules for intimate-apparel imagery change over time. Review Amazon, eBay, and Google Merchant Center's current requirements before publishing new galleries.
AI Lingerie Try-On: Scale On-Model Photos Without a Photoshoot
Once you know which lingerie poses work, the next challenge is producing enough on-model images without organizing a new photoshoot for every SKU. Koozee is built for apparel e-commerce and offers a dedicated AI try-on workflow for bras, underwear, swimwear, and other body-hugging garments. It can turn a flat lay, mannequin shot, or product photo into an on-model image while preserving the garment's fit, lace, texture, and color.
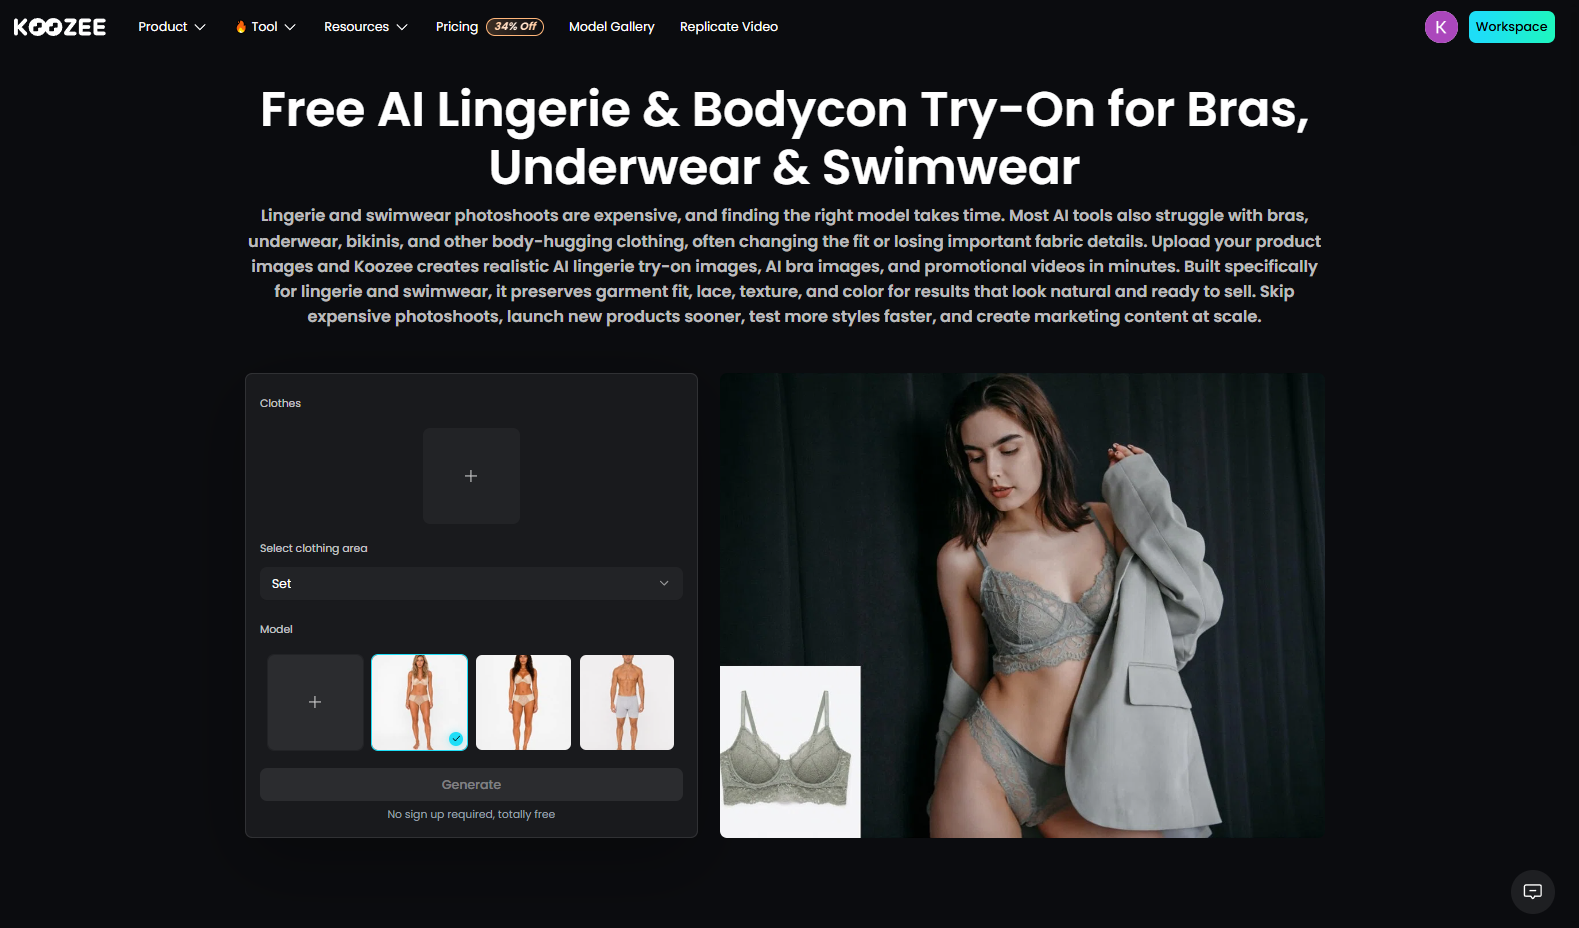
You can also create variations of the same product. Change the model's body type, skin tone, or overall look; place the product in different lifestyle scenes, such as bedrooms, beaches, poolside settings, or resorts; and turn generated images into short marketing videos for channels such as TikTok and Instagram. This makes Koozee useful not only for product listings but also for creating additional campaign and social assets.
How to use Koozee for lingerie poses:
Step 1. Upload the product image. Use a clear flat lay, mannequin photo, product shot, or existing model image with the full garment visible.
Step 2. Choose or provide a model reference. Use Koozee's model options or a reference image to guide the desired model appearance and body presentation.
Step 3. Generate the try-on image. Koozee places the lingerie on the AI model, giving you an on-model version of the original product.
Step 4. Create variations. Generate different models, body types, skin tones, poses, or scenes to build a broader image set from the same product.
Step 5. Turn images into marketing assets. Convert selected try-on images into short videos for social media and ads, or use the images for product pages and campaigns.
The tool can be particularly useful when a photoshoot is too expensive or slow to repeat for every new product. Koozee currently lets users try the lingerie try-on workflow without signing up.
FAQ: Lingerie Model Poses
How many photos should I include per lingerie product listing?
Aim for 4–6 images per SKU as a standard baseline. To maximize conversion, ensure your gallery covers the four core visual needs: true front fit, back construction, a tight detail close-up, and at least one lifestyle or contextual pose.
Can AI realistically generate lingerie model photos without a physical photoshoot?
Yes. Specialized apparel AI tools (like Koozee) can map flat-lay or mannequin shots onto virtual models while preserving product shape and placement. However, keep in mind that intricate textures like sheer mesh or delicate lace may require a quick visual check and light touch-ups before going live.
Are there platform-specific rules for on-model lingerie imagery?
Yes. E-commerce platforms and ad networks (such as Amazon, Meta, and Google Merchant Center) regularly update their strict policies regarding intimate apparel and skin exposure. Always audit your chosen poses against each channel's current advertising and product listing guidelines before launching campaigns.
You May Be Interested

9 Best AI Fashion Model Generators for E-commerce (2026)
Top 10 Virtual Try-on Apps for Shopify (2026)

12 Best Virtual Try-On Apps for E-Commerce (2026)
