How to Take Product Photos for Etsy: The Complete Guide for Apparel Sellers


For apparel sellers on Etsy, product photos aren't just decoration. Shoppers cannot touch the fabric, check the stitching, or try on a garment before they buy, which means your Etsy product photography does much of the selling before a shopper reads the full description. However, learning how to take product photos for Etsy can feel like a full-time job. Between hiring models, setting up lighting, editing backgrounds, and figuring out the correct Etsy listing photo size, the traditional photoshoot process can be expensive, slow, and fragmented.
Whether you are launching a new online boutique, scaling a vintage clothing shop, or creating handmade garments, this guide will show you how to take good pictures for Etsy, nail your technical image specs, and use modern AI workflows to turn simple product shots into high-converting and listing-ready visuals.
Key Takeaways
Lighting comes first: Natural window light is the most reliable, affordable way to get clean product photos. Try not to use harsh direct sunlight or your phone’s camera flash.
Etsy photo size matters: Upload images at least 2000px on the shortest side, use square (1:1) or landscape (4:3) orientation, and keep file sizes under 1MB for fast loading. And always preview your first photo thumbnail before publishing.
Clothing needs more than one shot: Use enough photos to show the front, back, fit, fabric, seams, size reference, and lifestyle context. Etsy currently allows up to 20 photos, but quality and coverage matter more than filling every slot.
Smartphones can do the job: A recent iPhone or Android with portrait mode, a tripod, and good light produces listing-ready photos — no DSLR required.
AI fills the clothing gap: When you can't book models or build sets for every SKU, AI tools like Koozee turn flat garment photos into model try-ons, flat lays, and ghost mannequin images.
Etsy Listing Photo Size and Requirements You Need to Know
Before touching a camera, understand what Etsy actually requires. Getting the technical specs right prevents your photos from appearing blurry, cropped awkwardly, or rejected during upload.
Etsy Photo Size: The Numbers That Matter
| Requirement | Specification |
| Minimum resolution | 2000px on the shortest side (for zoom functionality) |
| Recommended resolution | 2700 × 2025px (4:3) or 3000 × 2250px |
| Ideal aspect ratio | Square (1:1) or landscape (4:3) for the first photo |
| Resolution (PPI) | 72 PPI |
| Color mode | sRGB |
| Max file size | Under 1MB recommended (Max 10MB supported) |
| Accepted formats | JPG, PNG, GIF, SVG, and HEIC (Animated .gif files & transparent .png files are not supported) |
The square 2000 × 2000px format is the safest bet — it displays consistently across Etsy's search grid, mobile app, and desktop product pages without unexpected cropping.
⚠️ Warning: Avoid portrait (vertical) orientation for your first listing photo. Etsy's search grid crops portrait images aggressively, often cutting off the top or bottom of your product.
How Many Photos Per Listing?
Etsy allows up to 20 photos and 2 videos that are 5-15 seconds in length to each listing. For apparel, aim for 10-15 photos. Listings with fewer than 5 photos consistently underperform. Each photo should serve a purpose — don't upload near-duplicates just to fill slots.
Essential Equipment for Etsy Product Photography (On Any Budget)
You don't have to start with a studio. You need a few reliable tools that make consistency easy.
The Budget Setup (Under $100)
| Item | Purpose | Approximate Cost |
| Smartphone (recent model) | Camera — iPhone 12+ or equivalent Android | Already owned |
| Tripod with phone mount | Eliminates hand shake; keeps framing consistent | $15–30 |
| White foam board (2–3 pieces) | Reflector and backdrop | $3–5 each |
| Clip-on or standing lamp | Fill light for shadow reduction | $15–25 |
| Editing app (Snapseed or Lightroom mobile) | Brightness, color correction, cropping | Free |
The Prosumer Setup ($200–500)
Add these when you're ready to invest:
Entry-level DSLR or mirrorless camera with a 50mm lens — sharper than any phone, better in low light.
Softbox lighting kit (2 lights) — consistent, diffused light regardless of weather or time of day.
Seamless paper backdrop roll — cleaner than foam board for full-body clothing shots.
Clothing rack or mannequin — essential for consistent garment shape across listings.
💡 Pro tip: Start with the budget setup and upgrade only when you've confirmed your shop is generating consistent sales.
How to Take Product Photos for Etsy
Process 1. Master Natural Lighting for Clothing Photos
Lighting is the single biggest differentiator between amateur and professional-looking Etsy product photography. And natural light is free and often better than budget artificial lights.
How to Take Good Pictures for Etsy Using Window Light
Step 1. Find your window: A large north-facing or south-facing window delivers the most consistent, diffused light throughout the day. East/west windows work but require adjusting for the sun's position.
Step 2. Time your shoot: Mid-morning to mid-afternoon gives you the brightest, most even light. Avoid golden hour for product shots — the warm tone distorts fabric colors.
Step 3. Diffuse harsh sunlight: If direct sun is hitting your setup, hang a sheer white curtain or shower curtain liner between the window and your product. This softens shadows without darkening the scene.
Step 4. Position the product: Place it 2–4 feet from the window. Too close and highlights blow out; too far and you lose brightness.
Step 5. Bounce light into shadows: Set a white foam board opposite the window, angled toward the product. This reflects light onto the shadow side, reducing harsh contrast.
Step 6. Turn off all room lights: Mixing natural and artificial light creates uneven color casts that are hard to fix in editing.
✅ Best for: Sellers with fewer than 30 SKUs, shooting during daytime hours, working with a budget under $100.
Clothing-Specific Lighting Tips
Dark fabrics (black, navy, charcoal): Overexpose slightly (+0.3 to +0.7 EV) so texture details don't disappear into shadow.
White and light fabrics: Underexpose slightly (-0.3 EV) to avoid blowing out highlights and losing stitch detail.
Shiny or reflective fabrics (satin, silk, sequins): Use the most diffused light possible. Direct light creates harsh specular highlights that hide the garment's structure.
Process 2. Set Up a Simple Home Studio for Consistent Results
Without the perfect sunlight, a basic home studio gives you control over when and how you shoot.
Your DIY Etsy Product Photography Studio
Backdrop: A seamless paper roll (white or light gray, 4–5 feet wide) mounted on a stand, or a large foam board for smaller items. For full-length clothing shots, a wall-mounted roll is ideal.
Lighting: Two softbox lights placed at 45-degree angles to the product, one slightly brighter than the other to create natural-looking shadows. Avoid using a single light source.
Positioning:
Product 3–5 feet from the backdrop (reduces shadows on the background).
Lights at roughly your shoulder height, aimed slightly downward.
Camera at eye level or slightly above for flat lays; at product center for hanging garments.
💡 Pro tip: Use a steamer on clothing immediately before shooting. Wrinkles catch light unevenly and make even well-lit garments look careless. Keep a handheld steamer next to your setup.
Process 3: Photograph Clothing on Models vs. Flat Lays vs. Mannequins
This is where Etsy product photography for apparel diverges from general product photography. How you display clothing dramatically affects how buyers perceive fit, drape, and quality.
On-Model Photography (Best for Showing Fit and Drape)
Clothing photographed on a real person consistently outsells flat-only listings. Buyers need to see how fabric falls on a body, where hems hit, and how the garment moves.
If you can use a model:
Choose someone close to your target customer's body type.
Shoot from eye level, not looking down — this prevents distortion.
Capture movement shots (walking, turning) in addition to static poses.
Keep styling simple — avoid accessories that distract from your garment.
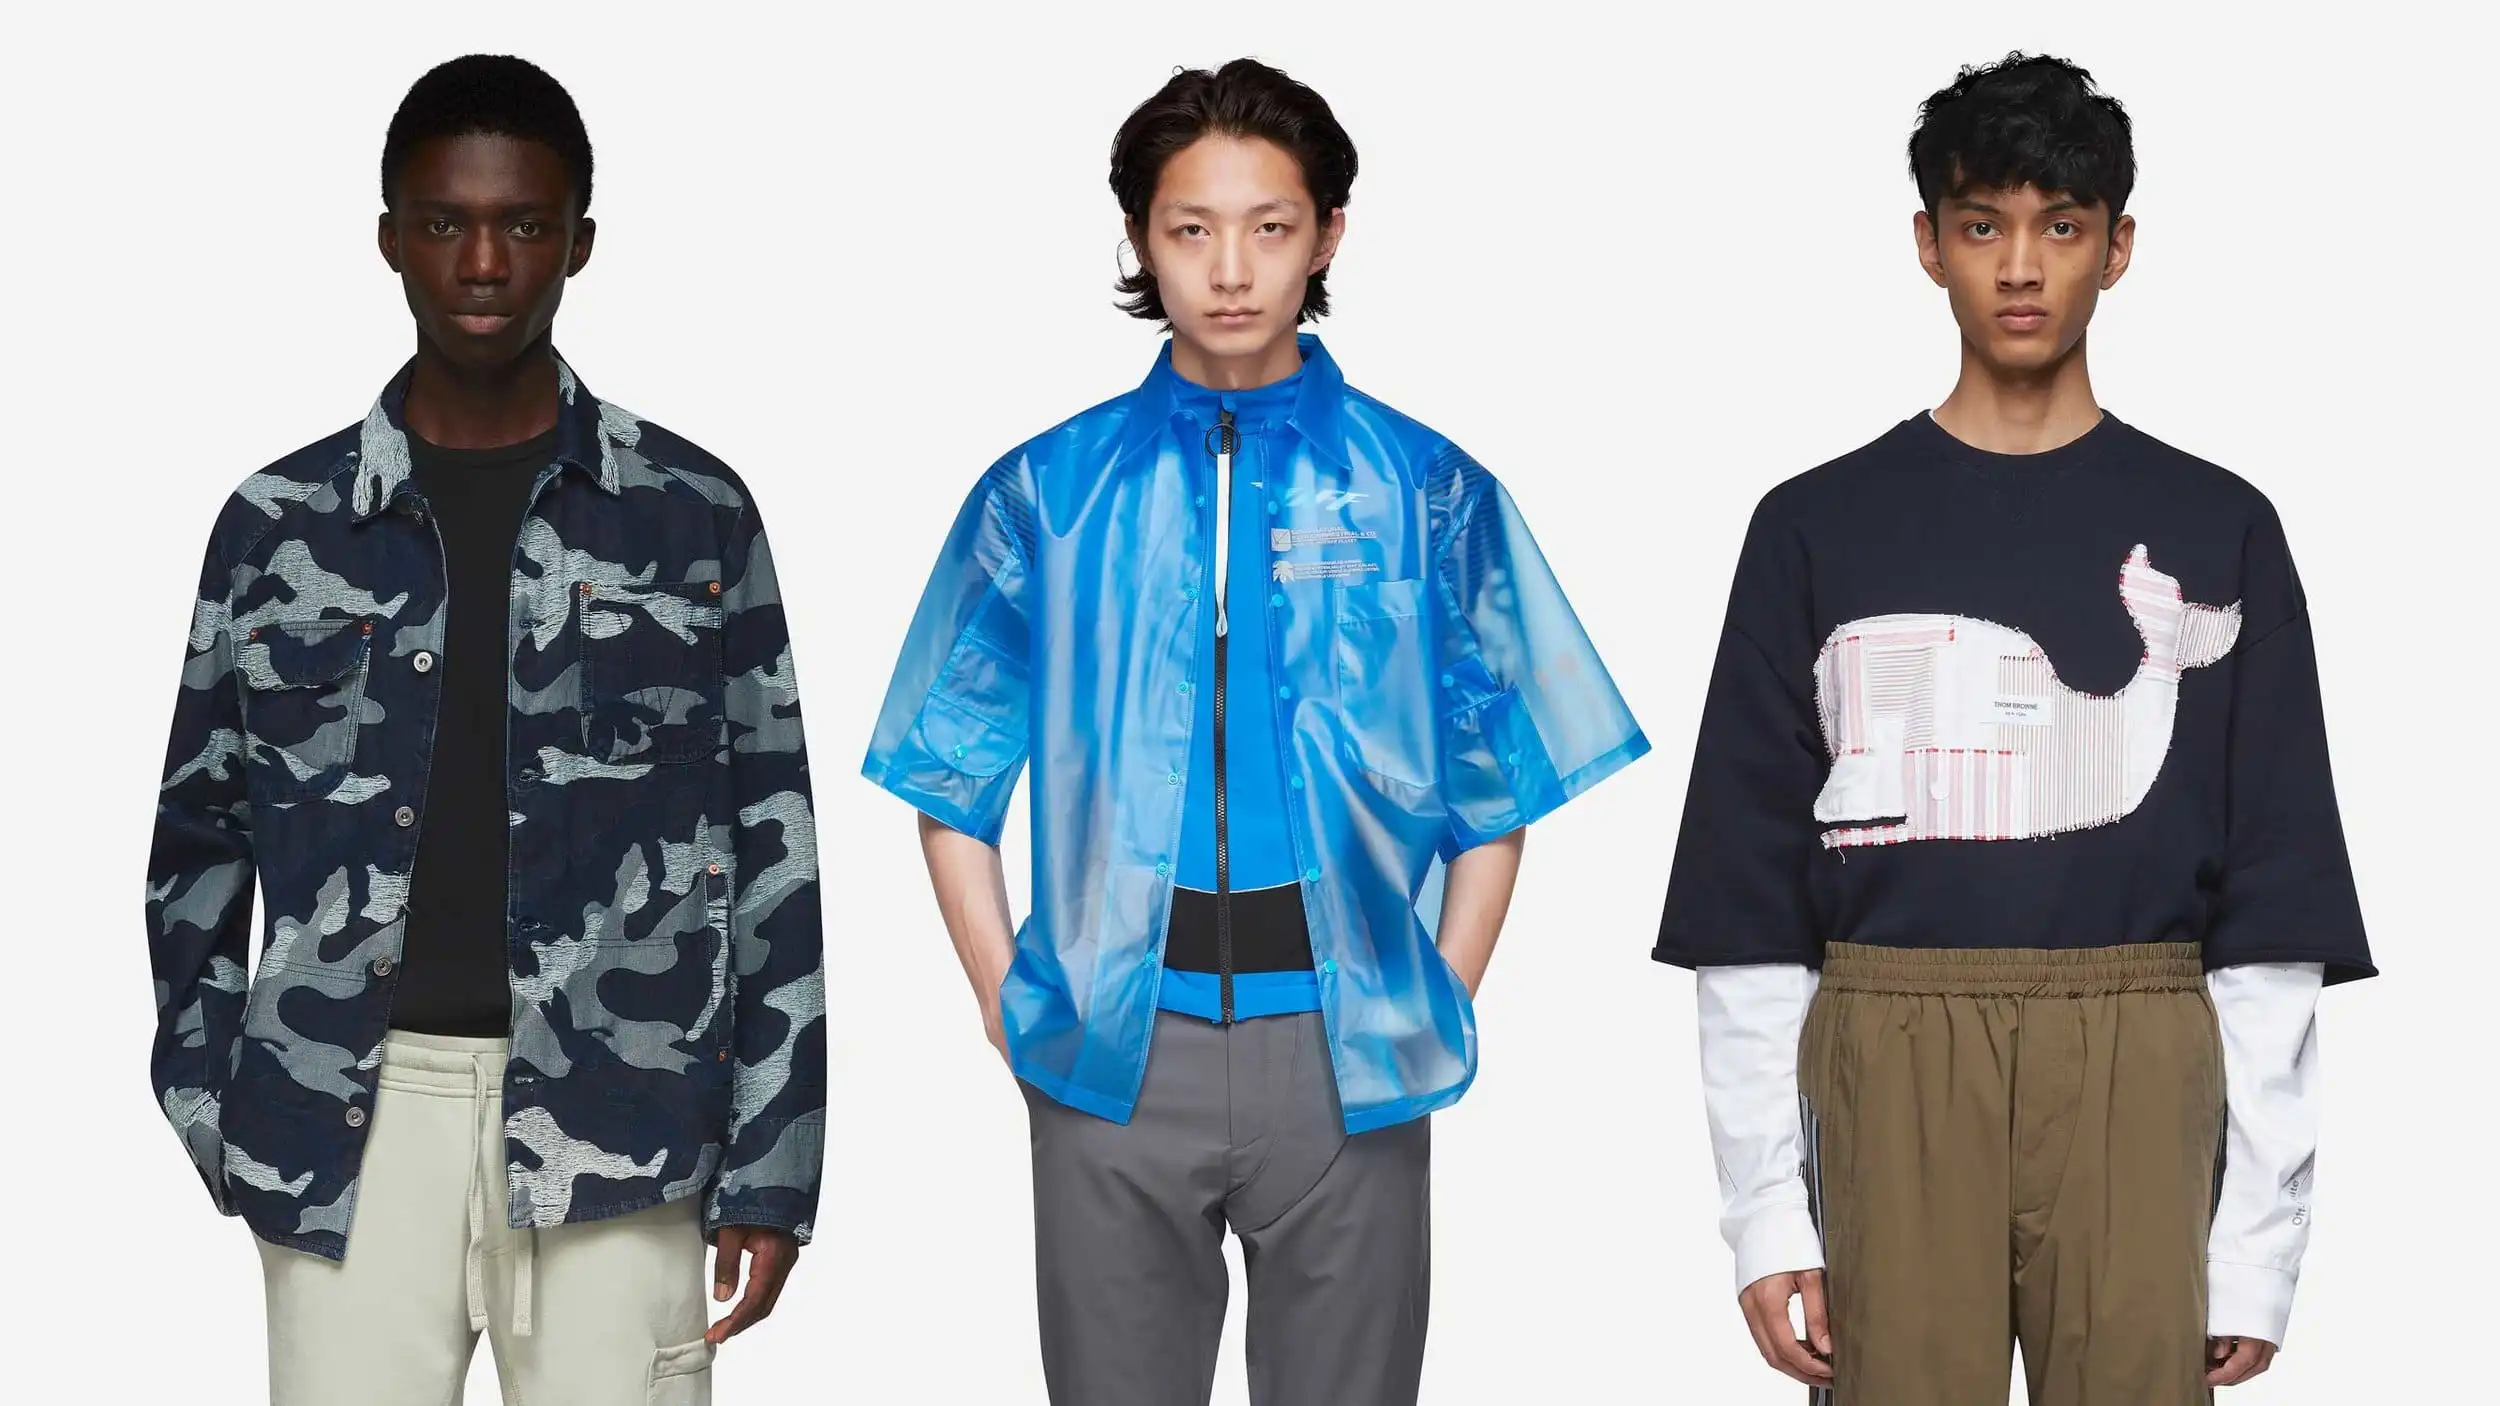
For sellers who can't use a model, we'll cover how AI tools address this gap in section 5. Booking models, coordinating schedules, and processing shoots for every new piece is neither affordable nor practical.
Flat Lay Photography
Flat lays are the most accessible clothing photography method — lay the garment on a flat surface and shoot from directly above. They work well for tops, dresses, and accessories.
Flat lay best practices:
Use a clean white or light wooden surface.
Arrange the garment naturally — slight folds and curves look more inviting than perfectly pressed flat.
Shoot from directly overhead using a tripod extended horizontally or a C-stand.
Style minimally: one or two complementary props (a plant, a pair of earrings) can add context.
Maintain consistent folding and styling across all your listings.
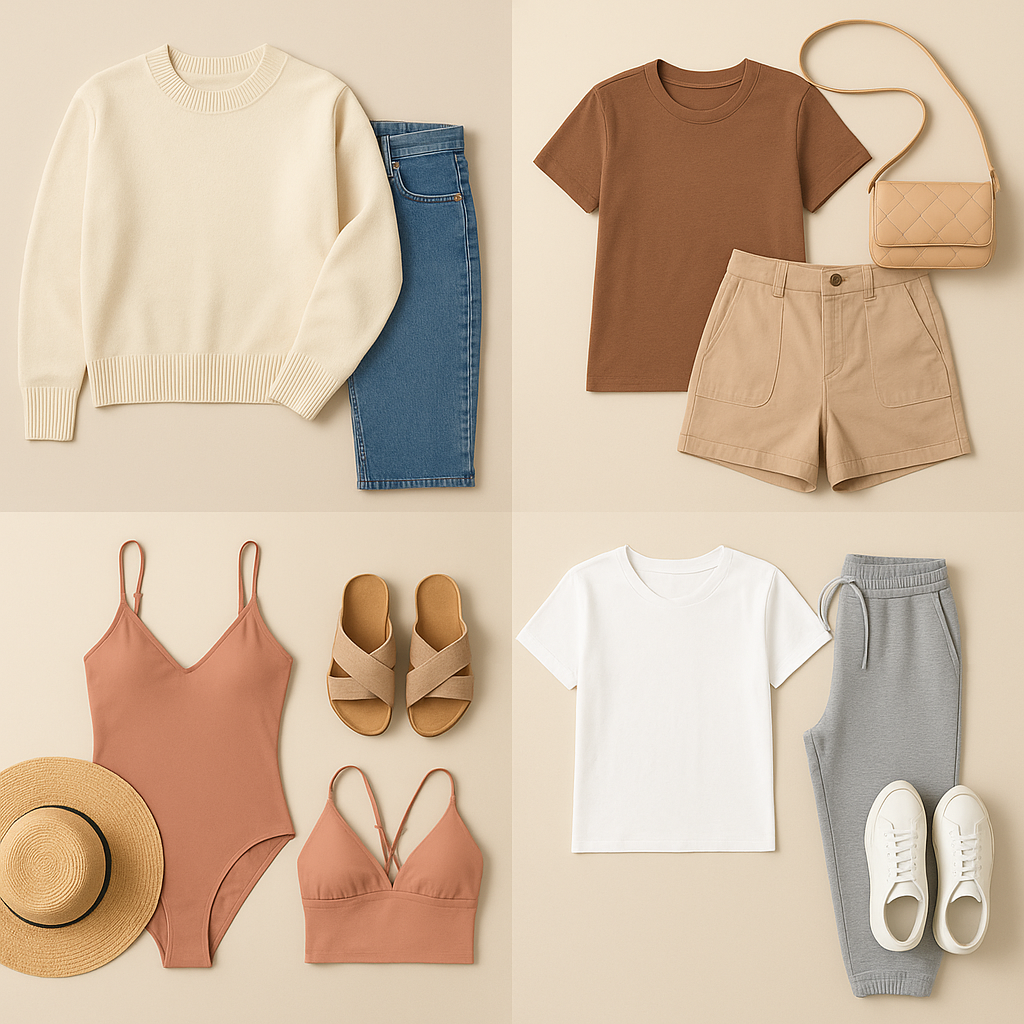
You may also like: How to turn flat lay into model
Ghost Mannequin (The Professional Middle Ground)
A ghost mannequin shot shows the garment's shape as if worn by an invisible person. It communicates fit and structure better than a flat lay, without requiring a live model.
How to create ghost mannequins for an Etsy shop:
Photograph the garment on a mannequin (front and back).
Photograph the inside of the garment separately.
Use photo editing software to composite the images, removing the mannequin.
Result: a 3D-looking garment with visible neckline, armholes, and hem structure.
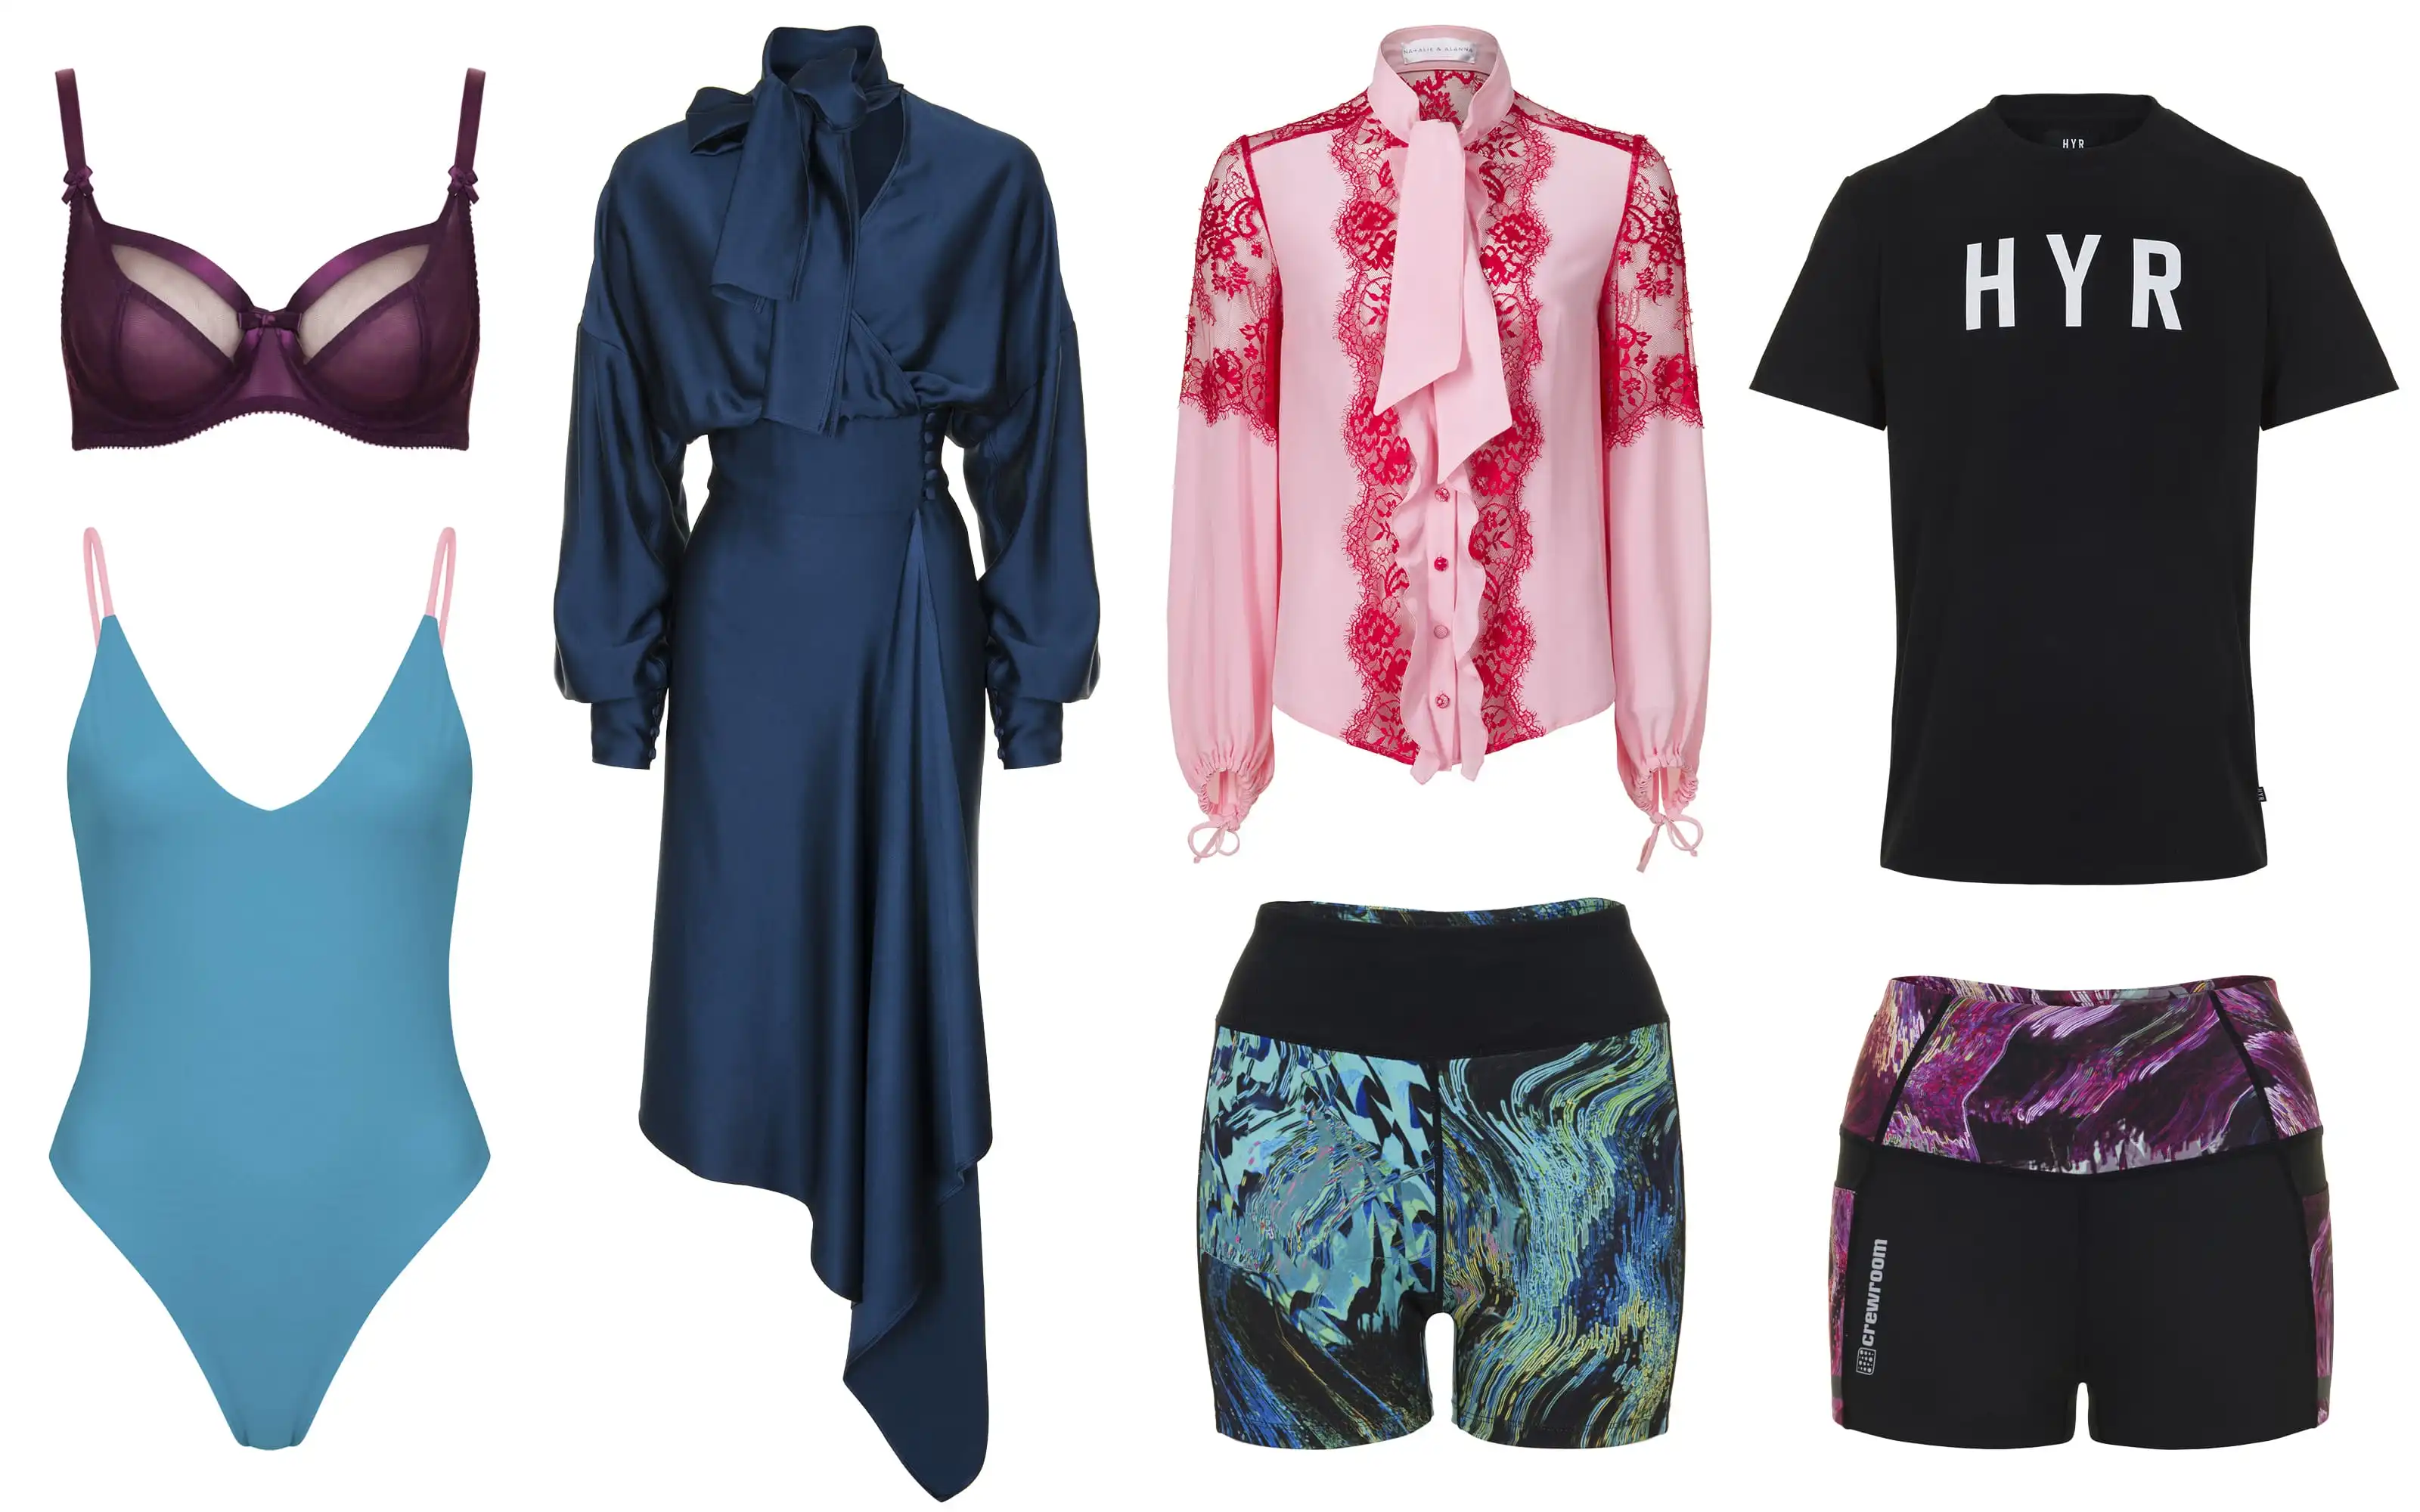
This is time-consuming to do manually. In modern product photography, AI tools have made this significantly faster.
✅ Best for each method: Model shots → best conversion, highest effort. Flat lays → fastest, good for casual/boho brands. Ghost mannequin → professional look without model logistics, ideal for structured garments.
Process 4. Capture Every Angle — The Shot Types Every Etsy Clothing Listing Needs
A single front-facing photo is not enough for showing a garment. Buyers need to mentally reconstruct the piece from multiple clothing angles.
The 7 Essential Etsy Clothing Shots
| # | Shot Type | What It Shows | Priority |
| 1 | Front, full garment | Overall silhouette, length, neckline | Required |
| 2 | Back, full garment | Back design, closure details, how back hem falls | Required |
| 3 | Side profile | Drape, sleeve length, how the garment hangs | High |
| 4 | Fabric close-up | Texture, weave, print detail | High |
| 5 | Detail shot: stitching/buttons/zippers | Craftsmanship, hardware quality | Medium |
| 6 | Size reference | Garment next to a measuring tape or common object | Medium |
| 7 | Lifestyle / in-context | Garment worn in a real setting, styled | High |
📌 Note: For your first listing photo — the one that appears in search results — use a clean, front-facing shot on a white or light background. Save lifestyle and detail shots for positions 3–7.
Editing Your Etsy Photos — What to Do and What to Avoid
Reviewing and editing every photo for Etsy is essential. It's correcting what every camera gets slightly wrong. But there's a line between enhancing and misleading.
What to Fix in Every Photo
Brightness and exposure: Lift shadows slightly; bring down blown highlights.
White balance: Correct for yellow (warm) or blue (cool) color casts so fabric colors are accurate.
Crop and straighten: Align to a grid; crop out edges of your backdrop or setup.
Spot removal: Remove dust, lint, or small background marks.
What to Avoid
Over-saturation: Don't make colors more vibrant than they are — this can cause returns for "item not as described".
Slimming or body-altering edits: Misrepresenting fit violates Etsy's policies and damages trust.
Heavy filters: They date your shop and obscure product details.
Adding elements that don't exist: Don't Photoshop patterns or textures that aren't on the actual garment.
Beyond Traditional Photography: How AI Tools Help Apparel Sellers Create Product Visuals Faster
Everything above works. But for apparel sellers running a real business on Etsy — managing dozens or hundreds of SKUs, releasing new pieces regularly, and competing against brands with dedicated photo budgets — traditional photography has hard limits.
The Real Bottleneck for Etsy Clothing Sellers
What traditional Etsy product photography asks of you:
Category | Details |
Model shoots | $100–500 per session, plus scheduling, location, and editing time — not viable for every new SKU. |
Multiple variations | Different colors of the same garment need separate shoots, or you're recycling the same photo and hoping buyers imagine the right color. |
Flat lays and ghost mannequins | Each takes 15–30 minutes to style, shoot, and edit — multiplied by every listing. |
Consistency | Maintaining identical lighting, framing, and editing across shoots done weeks apart is genuinely difficult. |
This is where AI tools like Koozee change the equation. They don't replace photography — they fill the gaps that make traditional photography unsustainable at scale.
How AI Complements Your Etsy Photography Workflow
Koozee is an AI visual production platform built explicitly for apparel e-commerce sellers. It turns basic product photos into professional, listing-ready assets in a single AI workflow. You upload a flat garment photo, and the platform generates:
On-model try-on visuals: Create model visuals for clothing products without arranging every shoot manually.
Flat lay product images: Clean, consistent flat lays with even lighting and professional styling.
Ghost mannequin images: Garment structure shots that show fit and shape, generated from your flat product photo.
Product listing page visuals: Create assets for Etsy, Shopify, and marketplace product pages after review and resizing.
Image enhancement: Sharpen, brighten, and clean up existing photos.
For an Etsy apparel seller, the practical workflow is simplified as:
Step 1. Take a clean flat photo of each garment (with your smartphone or DSLR).
Step 2. Go to Koozee's workspace and upload the clothing photo.
Step 3. Generate model try-ons, ghost mannequin shots, and listing-ready visuals for Etsy.
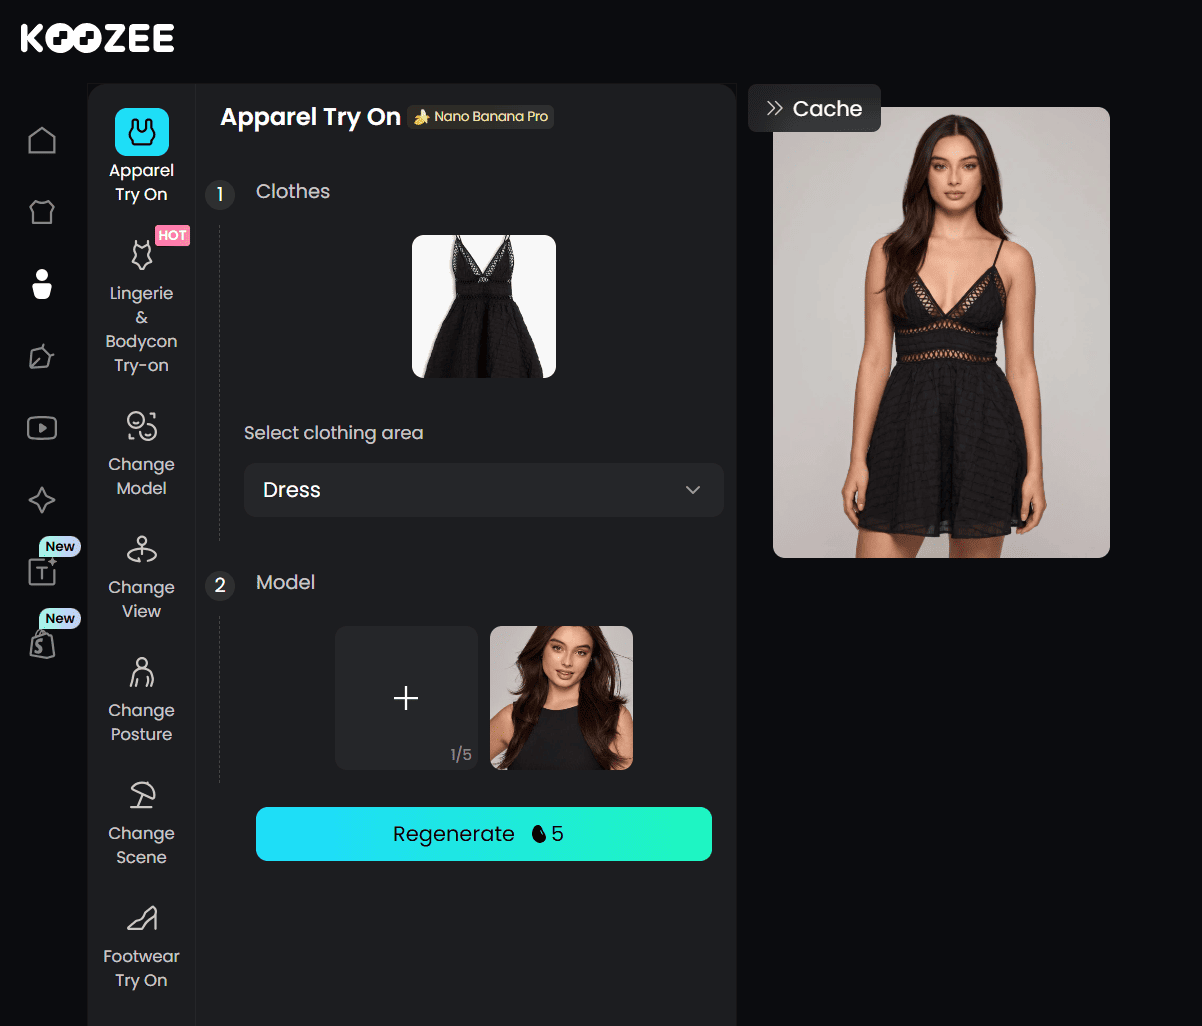
Step 4. Download the assets and upload them to your Etsy listing.
💡 Pro tip: Even if you still shoot key pieces with a model, AI-generated visuals let you quickly test new colorways, create consistency across your entire catalog, and update seasonal listings without organizing a new shoot.
What Koozee Is — and Isn't
Koozee is: An AI visual production platform that turns clothing product photos into model try-ons, flat lays, ghost mannequin images, product videos, and listing page assets — built for apparel e-commerce sellers.
Koozee isn't: A generic AI image generator or a replacement for all photography. It's a tool that handles the repetitive, expensive parts of apparel visual production so you can focus on designing and selling.
Try Koozee with 30 free credits and test it with one clothing product photo!
Quick Reference: Etsy Product Photography Checklist
Before publishing any listing, run through this checklist:
All photos at least 2000px on the shortest side
First photo is square (1:1) or landscape (4:3)
Each file under 1MB
Up to 20 photos per listing (front, back, side, detail, fabric, size ref, lifestyle)
Lighting is even — no harsh shadows or blown highlights
White balance is accurate — fabric colors match reality
Background is clean, uncluttered, and consistent across listings
No wrinkles on the garment
Product is centered with breathing room for Etsy's crop
At least one photo shows the garment on a body or mannequin (or an AI-generated try-on)
When everything is checked above, you can upload the photos to your Etsy shop for more sales.
Conclusion
Mastering how to take product photos for Etsy doesn't mean you have to spend thousands of dollars on equipment or weeks coordinating model shoots. By understanding basic lighting, adhering to the recommended Etsy listing photo size of 2000 x 2000 pixels, choosing your clothing photo types, and utilizing apparel-first AI tools, you can build a more professional and trustworthy Etsy storefront.
Ready to turn your clothing product photos into professional model try-ons, lookbooks, and listing-ready visuals? Try Koozee with your own clothing photos today and create more consistent apparel visuals without organizing a new photoshoot for every listing.
Frequently Asked Questions
What is the best photo size for Etsy listings?
Etsy recommends at least 2000px on the shortest side. The safest format is a square 2000 × 2000px image — it displays consistently across search, mobile, and desktop without cropping issues. Use sRGB color mode, 72 PPI, and keep image files under 1MB.
Can I use my phone to take product photos for Etsy?
Yes. A recent smartphone (iPhone 14 or newer, or an equivalent Android) with good natural light and a tripod can produce listing-ready photos. Use the main camera lens (not the ultrawide), avoid digital zoom, and clean the lens before every shoot.
How many photos should each Etsy listing have?
Etsy allows up to 20 photos. For apparel, aim for 10-15. Listings with fewer than 5 photos consistently underperform. Each photo should show a different angle, detail, or context. Avoid uploading duplicates.
What background is best for Etsy clothing photos?
White or light gray is the standard — it keeps attention on the product and looks clean in search results. For lifestyle shots, natural settings (a bedroom, a street scene, a cafe) work well as long as they don't distract from the garment.
How do I photograph dark clothing for Etsy?
Slightly overexpose your shot (+0.3 to +0.7 EV) so that fabric texture and details don't disappear into shadow. Use a light or white background for contrast, and make sure your light source is diffused to avoid harsh reflections.
How can I show clothing on a model without hiring one?
AI tools like Koozee can generate on-model try-on visuals from a flat garment photo. Upload your product image, generate an on-model visual, review garment accuracy, and then use the output as a supporting listing image. This is especially useful for sellers managing many SKUs or releasing new products frequently.
What's the difference between selling photos on Etsy and selling products using photos?
When selling photos on Etsy, the photograph itself is the final product being sold (such as digital downloads or wall art prints). When selling products using photos, the images serve as marketing visuals to showcase other physical or digital goods, such as clothing or crafts.
Should I use a white background or a lifestyle shot as my first Etsy photo?
A clean, well-lit product shot on a white or light neutral background is the safest and most effective choice for the first Etsy photo. It stands out in search results and clearly shows what you're selling. Use lifestyle shots in positions 2–5 to provide context.
You May Be Interested

6 Tips to Take Good Photos for Depop 2026

Flat Lay Clothing Photography: Complete Guide for Apparel Sellers

Amazon Product Photography for Clothing Sellers: 3 Methods 2026
