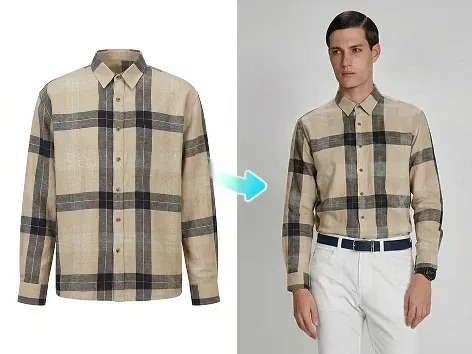
How to Photograph Clothing Without Models: 6 Best Methods for E-commerce
Learn how to photograph clothing without models using flat lay, hanger shots, ghost mannequin, and AI try-on. Step-by-step guide for apparel sellers.


Hiring models, booking studios, and waiting weeks for edited photos isn't realistic when you have 50 new SKUs to list this week. The traditional production bottleneck costs thousands of dollars and stalls your go-to-market speed. Luckily, many Shopify, catalog, social, and supplementary marketplace images can be created without live models, as long as they follow the platform’s category rules.
This guide details 6 proven methods to photograph garments without a model—ranging from a 10-minute DIY flat lay to realistic AI-generated try-ons. For each approach, we provide quick step-by-step setups, cost breakdowns, and honest limitations so you can scale your catalog without sacrificing product accuracy.
Key Takeaways:
Multiple Options Exist: Flat lay, hanger, ghost mannequin, dress form, and AI try-on are all proven model-free methods.
Flat Lay is Fastest: You can produce usable images in under 30 minutes with just a clean surface, natural light, and a smartphone.
Ghost mannequin is a common professional method for DTC stores, wholesale catalogs, and supplementary marketplace images because it shows garment structure without a visible person.
AI Try-On Scalability: Specialized platforms can instantly turn flat product photos into realistic on-model visuals.
Preparation Beats Gear: Wrinkle-free, lint-free, and properly shaped clothing will always outperform expensive cameras.
Pre-Shoot Checklist: Essential Setup
| Category | Key Requirement | Actionable Rule |
| Garment Prep | Wrinkle & Flaw Control | Steam everything; lint-roll dark fabrics; clip loose threads. |
| Volume & Alignment | Lightly stuff sleeves with tissue paper; align buttons and hems. | |
| Lighting | Even Illumination | Use diffused window light (with a reflector) or two 45° softboxes. |
| Color Accuracy | Avoid direct sunlight and never mix natural window light with warm indoor bulbs. | |
| Background | Clean & Neutral | Use white/light-grey seamless paper or a plain, untextured wall. |
| Equipment | Camera & Lens | Use a modern smartphone or a DSLR with a 50mm prime lens. |
| Consistency | Always use a tripod to lock in identical angles and framing for every SKU. |
💡 Pro Tip: Consistency beats perfection. Maintaining uniform lighting, framing, and angles across your entire catalog builds a cohesive storefront that drives customer trust.
How to Photograph Clothing Without Models - 6 Methods
Method 1: Flat Lay Photography
Flat lay is the most accessible way to photograph clothing without a mannequin. You lay the garment flat on a clean surface and shoot from directly above.
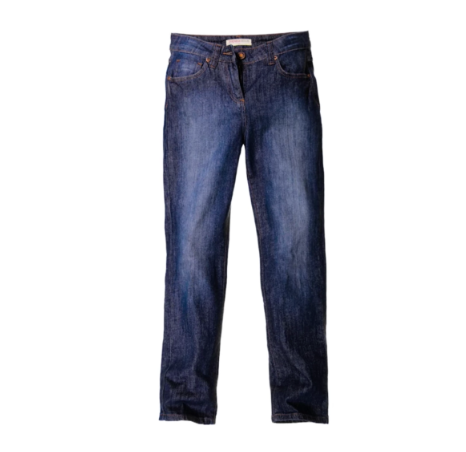
Step-by-step:
Prepare your surface. Use a clean white foam board, a seamless paper roll, or a plain light-colored floor. Make sure the surface is large enough to fit the entire garment without cropping.
Steam and shape the garment. Lay it flat and smooth out all wrinkles. Fold sleeves naturally—slightly away from the body—to show the full silhouette.
💡 Pro Tip: To prevent the garment from looking lifelessly flat, stuff sleeves and the torso lightly with thin tissue paper to create a subtle 3D volume. Use double-sided tape underneath to anchor collars and straight hems in place.
Set up your lighting. Position two light sources (or windows) on either side of the garment at a 45-degree angle. Avoid overhead lighting that creates shadows in the center.
Position your camera directly overhead. Use a tripod with a horizontal extension arm, or stand on a stable step stool. The camera lens must be perfectly parallel to the floor—any tilt will distort the garment's proportions.
Frame the shot. Leave a small margin of background around the garment. Don't crop too tight.
Shoot in RAW if possible. This gives you more flexibility in post-production for color correction.
Edit for color accuracy. Adjust white balance so the garment color matches the real item. Buyers return products when the color doesn't match—this is one of the most important edits you'll make.
⚠️ Warning: Flat lay works best for items that lie naturally flat—t-shirts, jeans, knitwear, and accessories. It's less effective for structured garments (blazers, coats, dresses with volume) because the shape collapses. Also, be prepared: the most time-consuming part isn't pressing the shutter, but constantly fidgeting with symmetry and fabric alignment between shots.
Best for:
Casual and everyday clothing (t-shirts, hoodies, jeans, loungewear)
Accessories and flat items (scarves, belts, socks)
Social media content (Instagram, Pinterest)
Sellers who need a fast, low-cost setup
Method 2: Hanger Photography — Displaying Clothes Without a Mannequin
Hanger photography is the simplest way to show a garment's drape, length, and silhouette without any additional equipment.
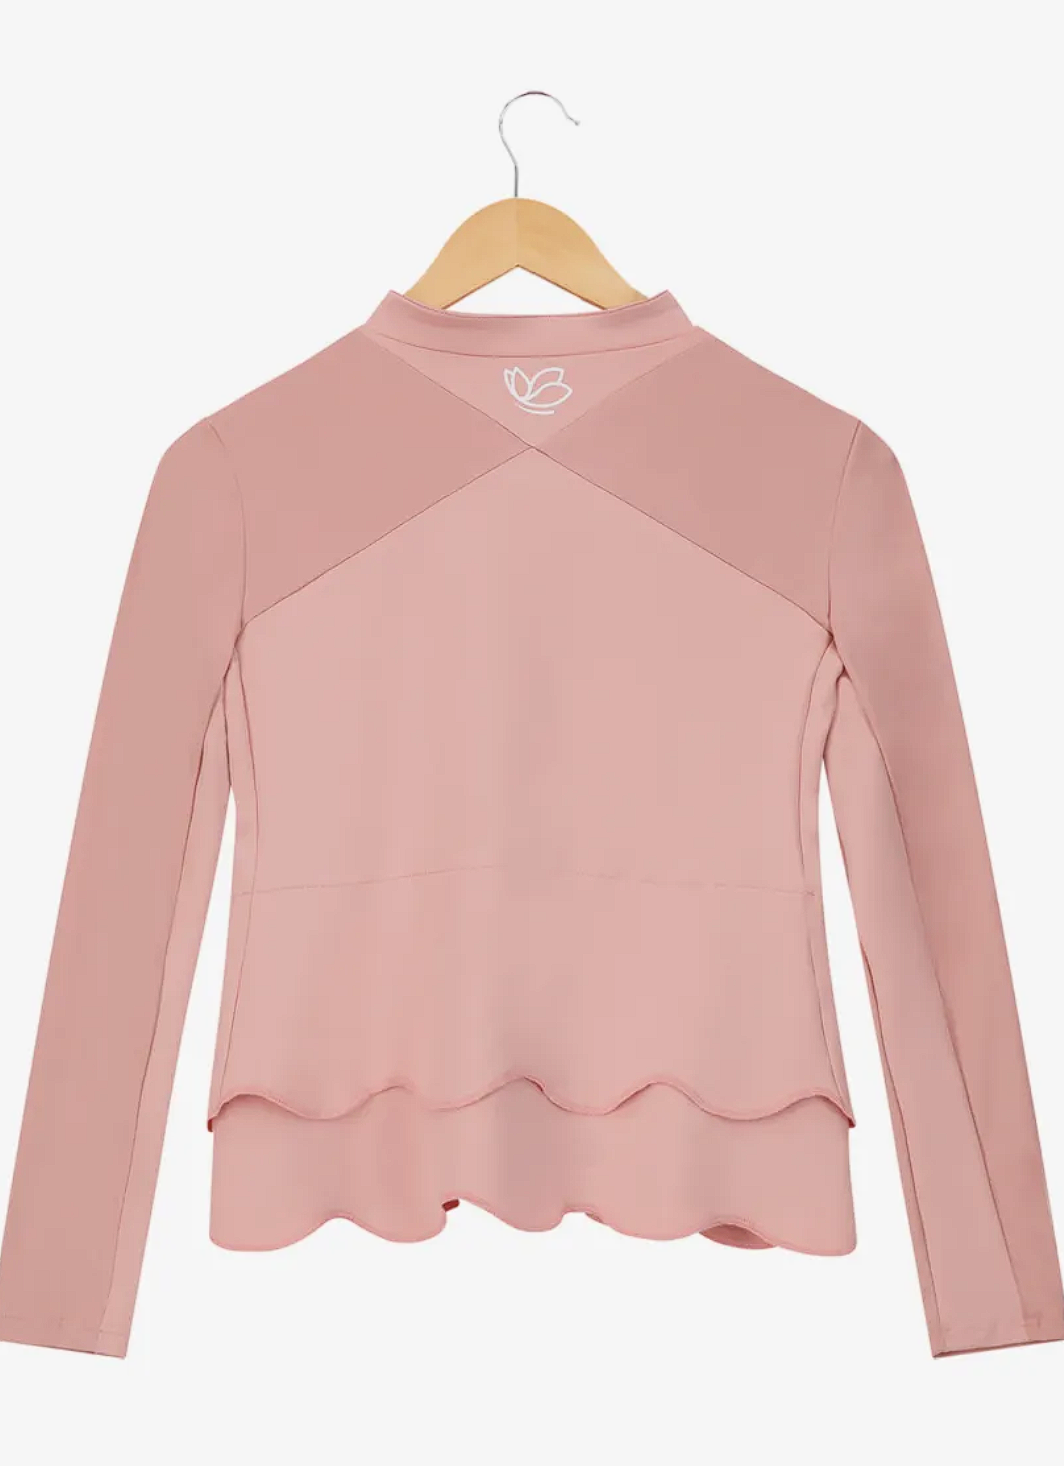
Step-by-step:
Choose the right hanger. Use a padded or velvet hanger that matches the garment's shoulder width. Wire hangers distort the shoulder line and look unprofessional.
Hang the garment against a plain wall or backdrop. A white or light grey wall works well. Make sure the wall is clean and free of marks.
Steam the garment while it's hanging. This is easier than steaming flat and produces better results for items with natural drape (dresses, blouses, trousers).
Position your light source. A window to the side of the garment creates soft, directional light that shows fabric texture. Avoid shooting with the window directly behind the garment (backlit) unless you want a silhouette effect.
Shoot at eye level with the garment's center. This produces the most natural proportions. Shooting from below makes the garment look elongated; shooting from above makes it look compressed.
Shoot front, back, and any key detail areas (pockets, collar, hem, print).
💡 Pro tip: For a cleaner look, use a clear acrylic hanger — it's less visually distracting than a wooden or colored hanger and keeps the focus on the garment.
Best for:
Dresses, blouses, shirts, and trousers
Sellers listing on marketplaces where a simple, clean image is sufficient
Quick catalog updates when you need to photograph many SKUs fast
Garments with interesting drape or fabric texture
Method 3: Ghost Mannequin (Invisible Mannequin) Photography
The ghost mannequin technique creates the illusion that an invisible body is wearing a garment. It remains the industry standard for fashion brands because it is the most effective way to display true tailoring, cut, and fit without a live model.
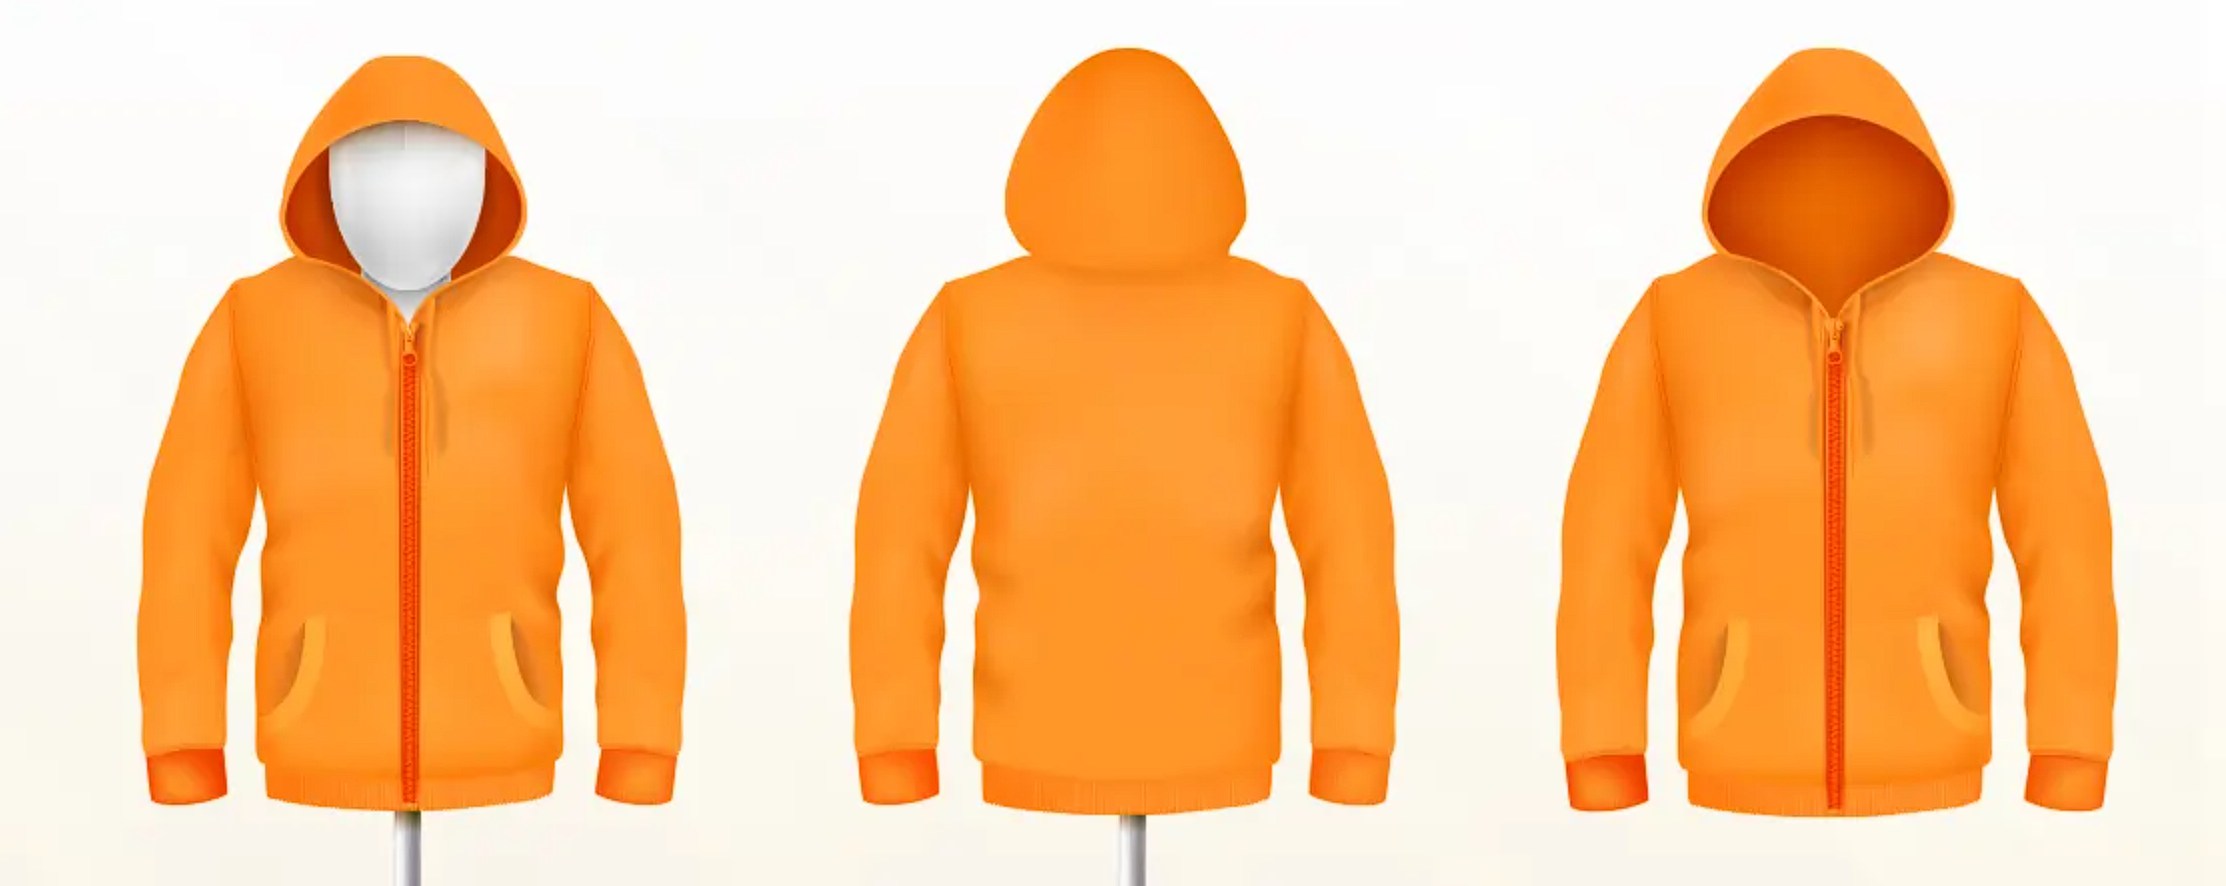
Traditional ghost mannequin — step-by-step:
Dress the mannequin. Use a mannequin that matches the garment's size. Adjust the form to showcase the apparel's tailored silhouette.
Photograph the garment on the mannequin. Shoot front, back, and sides. Use consistent, shadow-free studio lighting and a tripod.
Photograph the garment's interior. Remove the garment, turn it inside out, or lay it flat to photograph the neck label, inner lining, and any interior details that will be visible in the final composite.
Remove the mannequin in post-production. Use Photoshop (or a similar tool) to mask out the mannequin body, leaving only the garment. Composite the interior shot to fill in the hollow neck and armhole areas.
Clean up the edges. Refine the mask around the garment's edges, especially at the shoulders and armholes, to ensure a clean, floating look.
⚠️ Warning: Traditional ghost mannequin photography requires solid Photoshop skills and takes 30-60 minutes per garment in post-production. For sellers with large catalogs, this bottleneck adds up quickly.
💡 Industry Shift: To cut down studio time, many brands now invest in modular magnetic mannequins (where necklines and chest pieces snap off), though the heavy Photoshop editing layer still remains.
Best for:
Structured garments (blazers, suits, jackets, heavy coats, tailored dresses)
Brand websites and premium marketplace listings (Amazon A+, Shopify Plus stores)
Garments where internal details (linings, premium labels) are key selling points
Method 4: Dress Form Photography
A dress form (also called a dressmaker's dummy) is a padded torso form that gives garments shape without requiring a live model. It's a middle ground between flat lay and ghost mannequin.
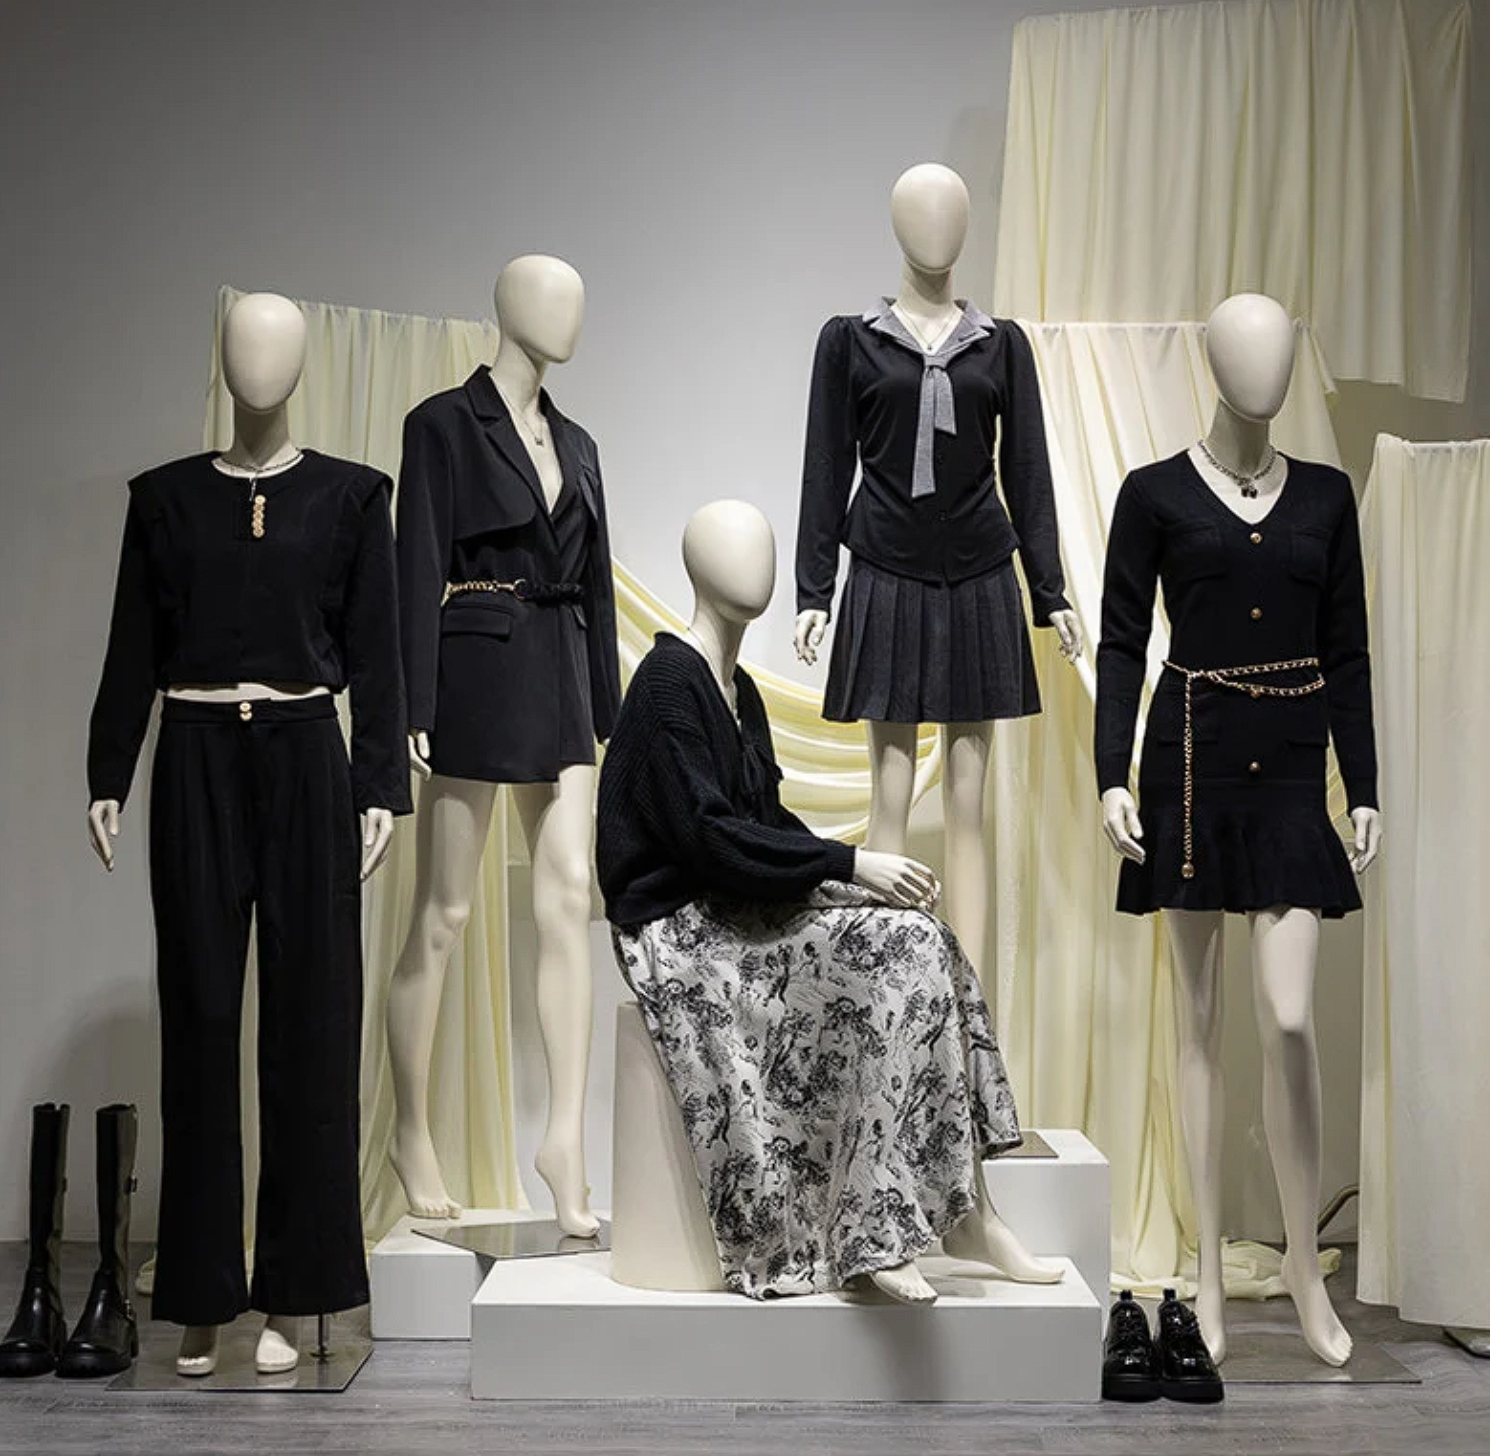
Step-by-step:
Choose a dress form that matches your garment's size. Adjustable dress forms are more versatile for sellers with multiple size ranges.
Dress the form carefully. Smooth out all wrinkles, align buttons and zippers, and shape the garment as it would look when worn.
Position the dress form against your backdrop. A plain white or grey background keeps the focus on the garment.
Light from the side. Side lighting creates depth and shows fabric texture better than flat frontal lighting.
Shoot at the same height as the dress form's center. This produces natural proportions.
Shoot multiple angles. Front, back, and 3/4 angle are the minimum for most listings.
📌 Note: Dress forms don't have arms or legs, so they work best for tops, dresses, and jackets. For trousers, jeans, and skirts, you'll need to combine with a flat lay or hanger shot.
Best for:
Tops, dresses, jackets, and structured garments
Sellers who want more shape than flat lay but don't want to invest in ghost mannequin post-production
Small brands building a consistent catalog look
Method 5: Photographing Clothes on a Hanger Against a Styled Background
A variation of standard hanger photography, this method uses a styled background — a textured wall, a wooden rack, or a lifestyle setting — to add visual interest without a model.
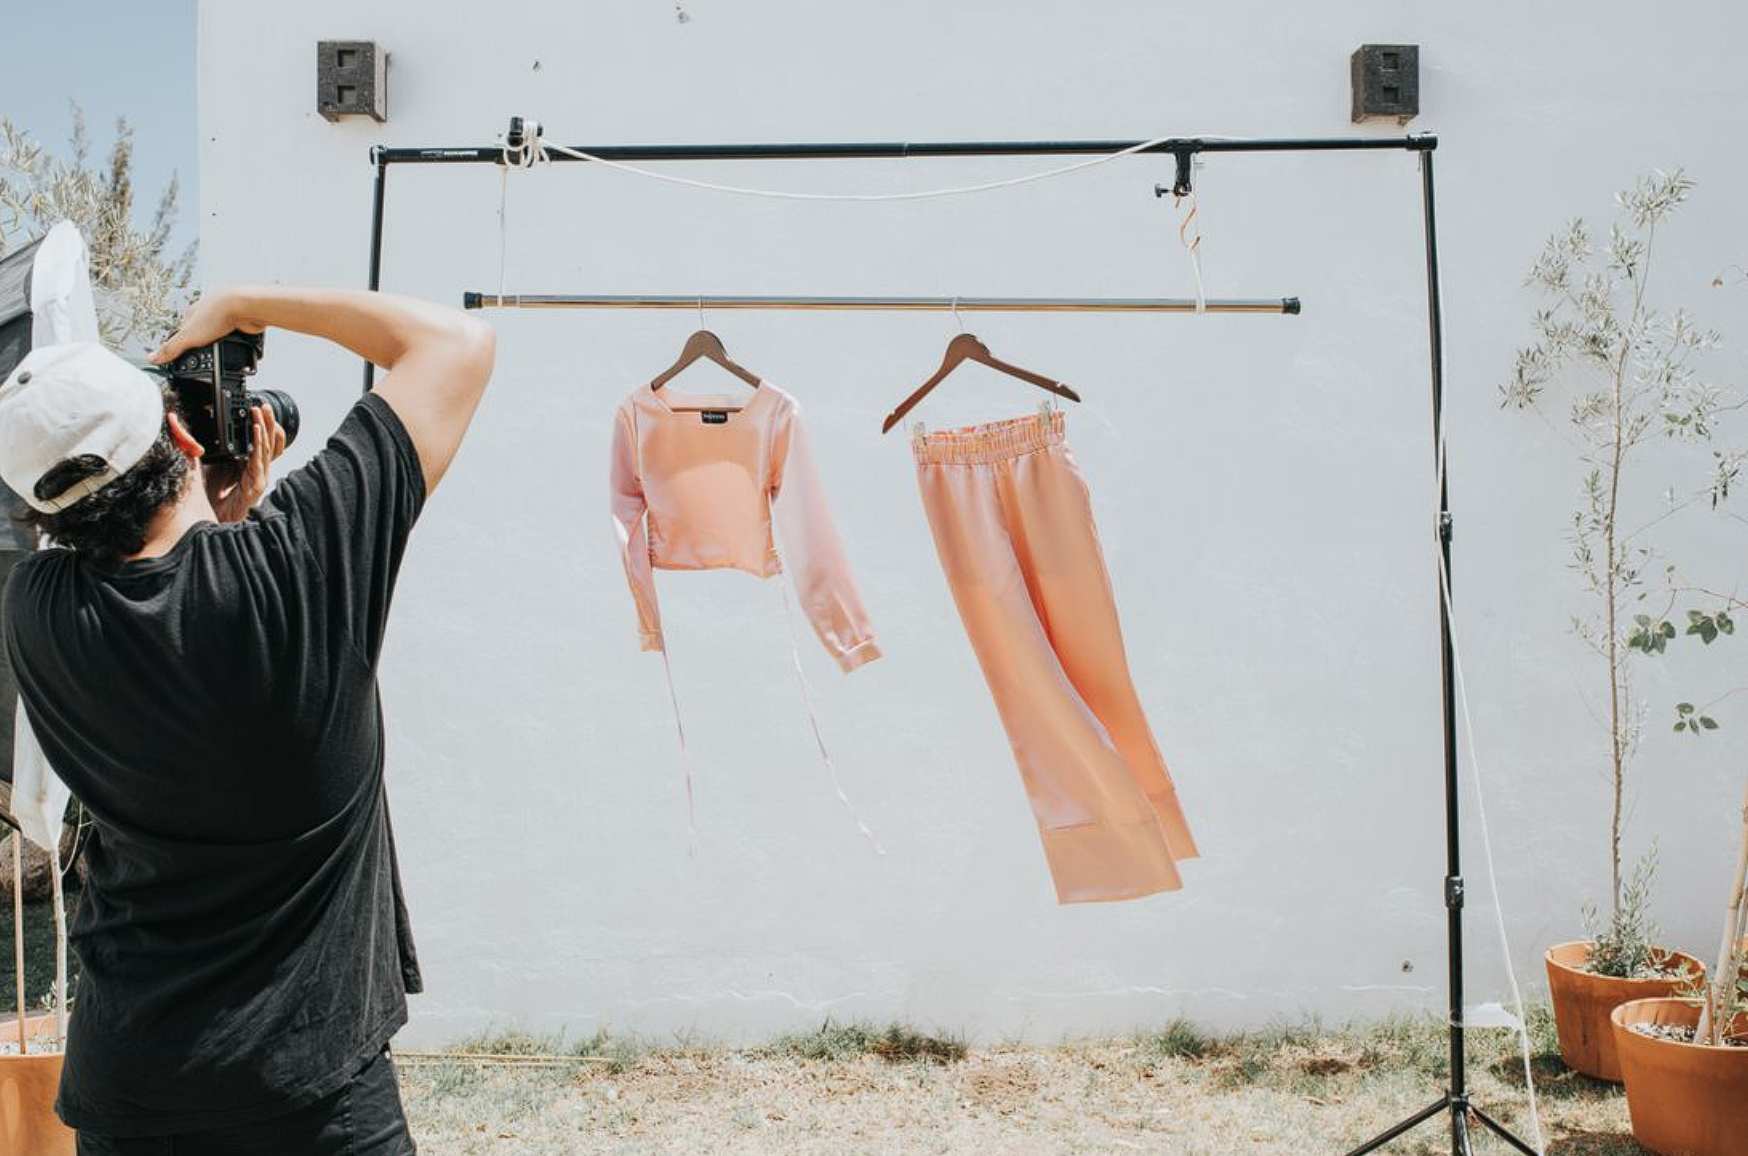
Step-by-step:
Choose a background that complements the garment. A rustic wooden wall works for casual wear; a clean white brick wall works for streetwear; a minimalist grey backdrop works for premium basics.
Hang the garment at a natural height. The top of the hanger should be at or slightly above eye level in the frame.
Add minimal props if needed. A plant, a folded accessory, or a simple surface element can add context without distracting from the garment.
Use natural light from the side. Avoid direct flash — it flattens the image and removes texture.
Shoot at a slight angle (rather than perfectly straight-on) to add depth and visual interest.
Best for:
Lifestyle and brand-focused content
Social media (Instagram, Pinterest, TikTok)
Casual and streetwear brands
Sellers who want more visual personality than a plain white background
Method 6: All-in-One AI Apparel Studios — Streamlining Your Entire Visual Catalog
Beyond just generating virtual models, advanced all-in-one AI studios allow sellers to manage their entire visual asset pipeline—from generating hyper-realistic flat lays and dynamic AI ghost mannequins to creating close-up clothing detail images and high-converting product main images.
Purpose-built platforms like Koozee are engineered specifically for apparel retail. They analyze garment texture, drape, and silhouette, seamlessly transforming a single clothing shot into diverse, platform-ready marketing assets.
Full Catalog Image Generator: Transforms a single clothing photo into a complete set of standard marketplace assets, including AI Ghost Mannequins, Realistic Flat Lays, Product Main Images, and Clothing Detail Close-ups.
All-Size Apparel Try-On: Instantly maps garments onto virtual models of diverse body frames, sizes, and skin tones with hyper-accurate fabric texture, silhouette, and drape preservation.
Intimate & Fitted Apparel Workflows: Offers dedicated try-on algorithms specifically optimized for high-friction categories like lingerie, swimwear, and bodycon dresses.
The typical step-by-step workflow:
Step 1. Select the Apparel Try-On feature. Koozee offers dedicated workflows for standard apparel, bodycon garments, and swimwear.
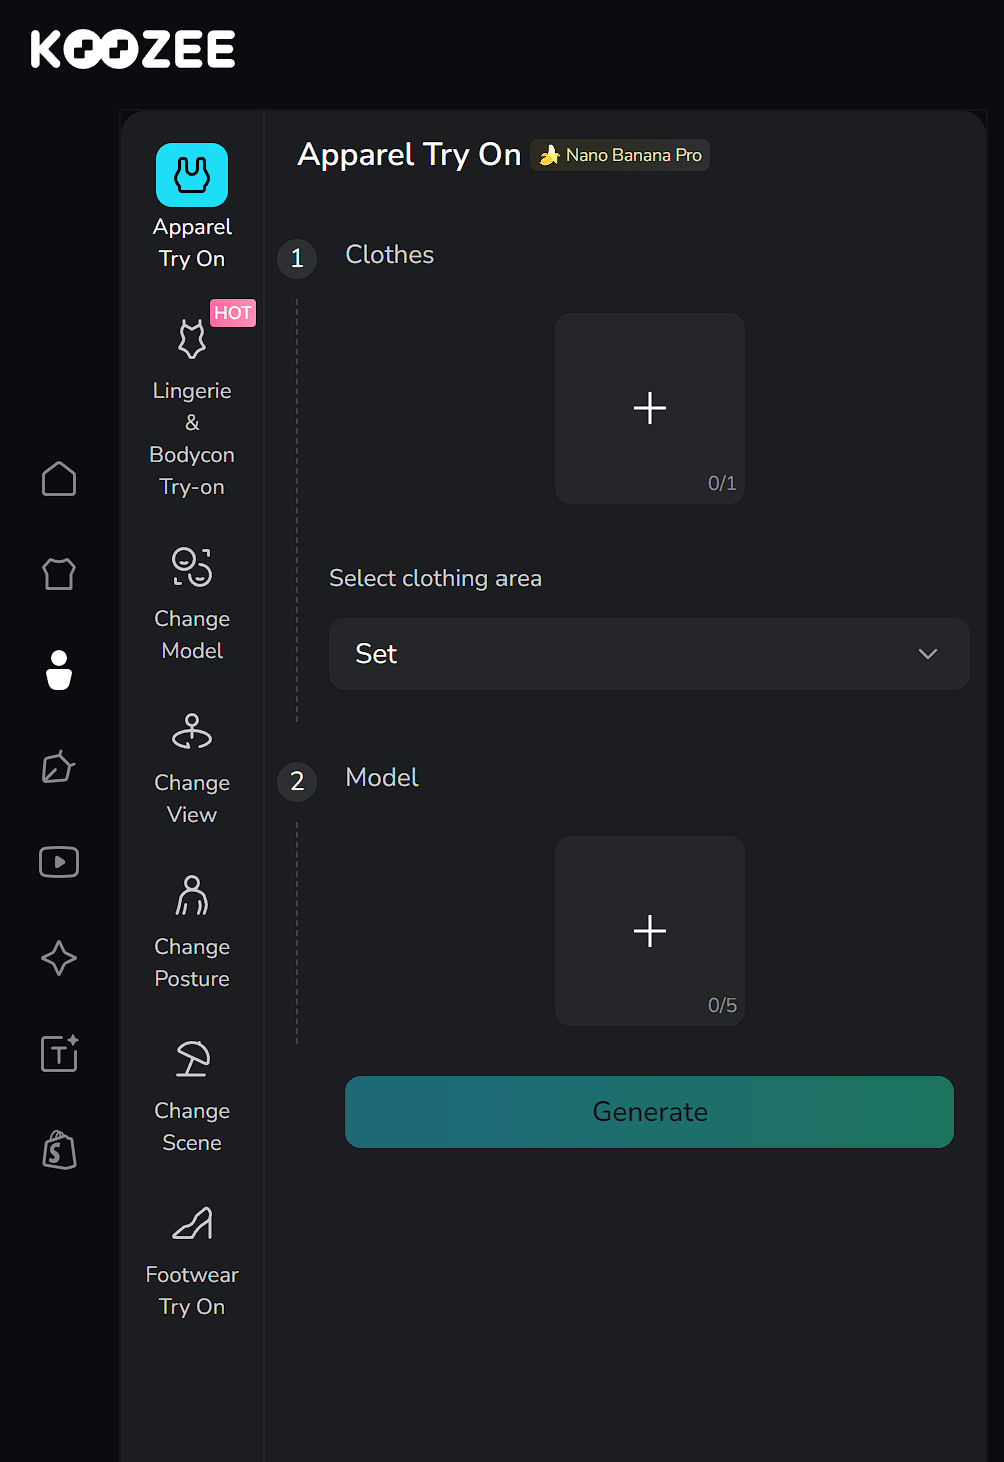
Step 2. Upload your image. A clean, wrinkle-free flat lay or hanger shot works best.
Step 3. Choose your model and scene. You can also select specific clothing areas.
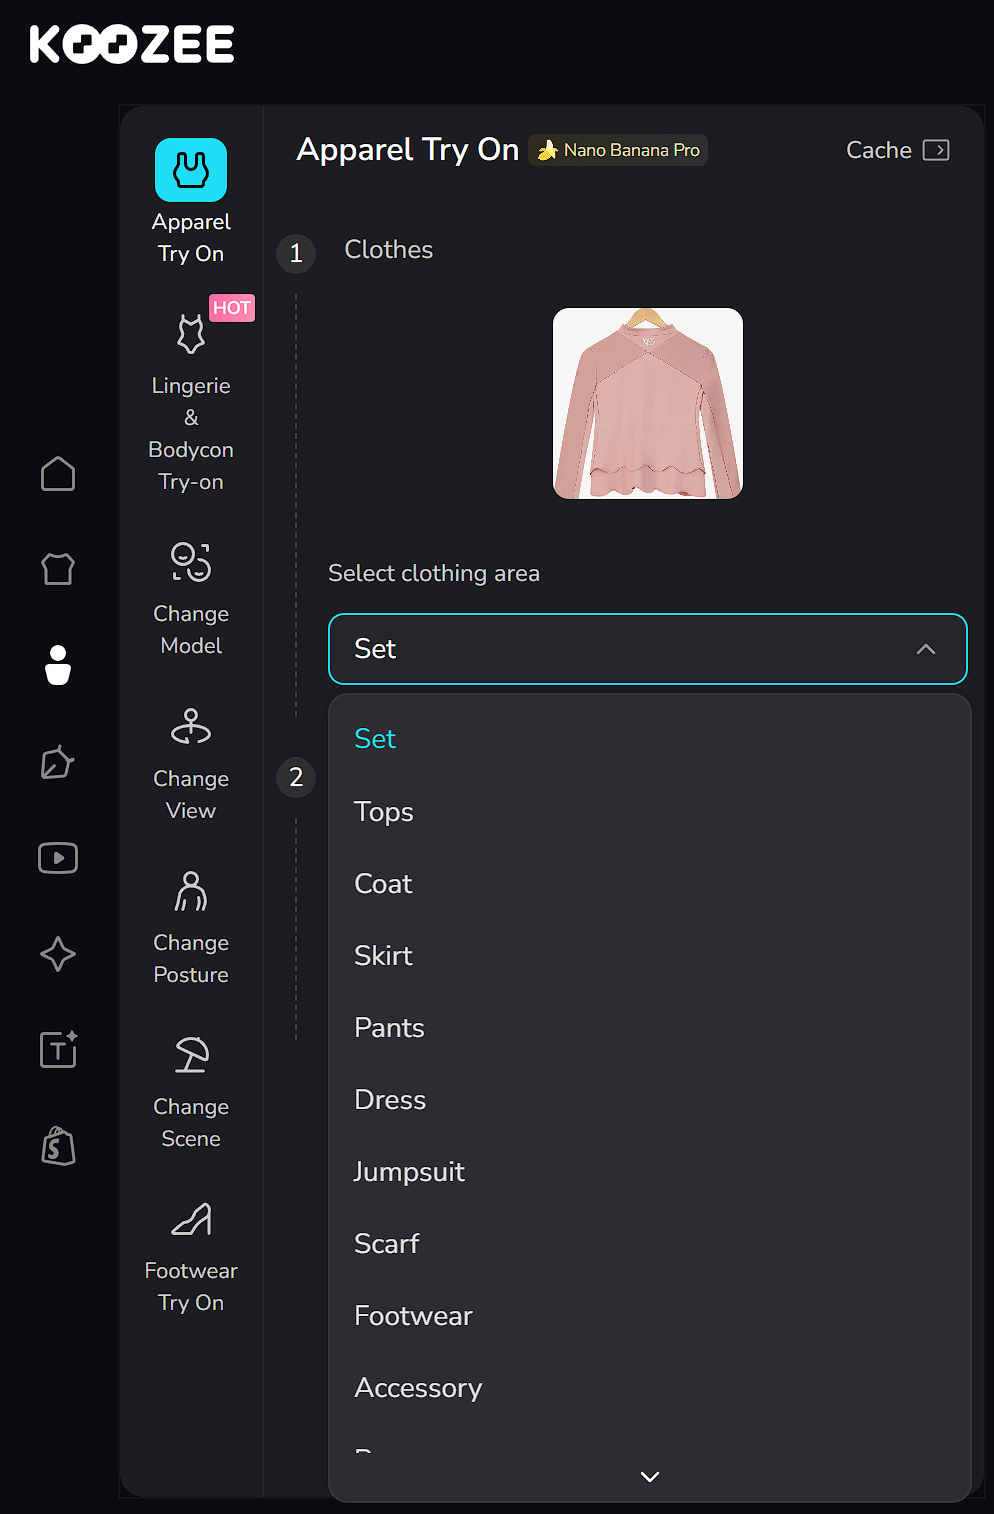
Step 4. Generate and strictly review. The AI produces the visual in minutes. Always inspect for text/print distortions and color accuracy to avoid product return risks.
🛠️ Shopify Integration: Koozee’s Shopify app lets you pull products directly from your store and sync approved assets back to listings in a single workflow—no manual downloads or re-uploads required.
⚠️ An Honest Note on Returns & Accuracy: E-commerce relies on "what you see is what you get." Always ensure the AI-generated image strictly reflects the physical garment. If the AI over-smooths fabric folds or alters unique patterns, it can mislead buyers and drive up return rates. Use AI to scale, but keep human QA as your final step.
Best for:
High-volume sellers: Shopify, Amazon, and dropshippers needing model visuals at scale.
Niche or high-cost apparel: swimwear, athleisure, and bodycon brands looking to avoid expensive, specialized shoots.
A/B Testing: Fast-fashion brands launching new lines that want to test multiple models and scene variations quickly.
Method Comparison: Which Approach Is Right for You?
| Method | Cost | Time per Garment | Best Result For | Skill Required |
| Flat Lay | Very low | 5–15 min | Casual wear, social media | Low |
| Hanger Shot | Very low | 5–10 min | Drape, length, quick catalog | Low |
| Ghost Mannequin | Medium (mannequin + editing) | 30–60 min | Structured garments, premium listings | High (Photoshop) |
| Dress Form | Low–Medium | 10–20 min | Tops, dresses, jackets | Low–Medium |
| Styled Hanger | Low | 10–20 min | Lifestyle, social media | Low–Medium |
| AI Try-On (Koozee) | Low per image | 2–5 min | All garment types, model visuals at scale | Low |
Use-Case Recommendation Table
| Your Situation | Recommended Method | Why |
| Just starting out, zero budget | Traditional flat lay + hanger shots | Fast, free, and good enough for early baseline listings. |
| Need an all-in-one catalog solution fast | All-in-One AI Studio (Koozee) | Generates model visuals, ghost mannequins, and main images from a single upload. |
| Selling structured garments (blazers, coats) | Koozee AI Ghost Mannequin or Traditional Ghost Mannequin | Preserves garment structure, shoulders, and lining fit without human models. |
| Selling lingerie or swimwear | AI Try-On (Koozee) | Avoids expensive, highly sensitive intimate apparel photoshoots. |
| Building a lifestyle brand aesthetic | Styled hanger + AI Studio background generation | Blends editorial lifestyle backdrops with highly accurate product textures. |
| Shopify seller with high SKU volume | Koozee Shopify App | Streamlines generation, preview, and direct-to-store publishing in one workflow. |
| Need extensive model/scene variations | AI Try-On (Koozee) | Instantly scales lookbooks with multiple sizes, poses, and backgrounds without re-shooting. |
FAQs About Photographing Garments without Using Models
What is the easiest way to photograph clothes without a mannequin?
Flat lay photography is the easiest starting point. Lay the garment on a clean white surface, position a light source to the side, and shoot from directly above with your smartphone. It requires no special equipment and can produce usable product images in under 30 minutes. For a more professional result without a mannequin, AI try-on tools like Koozee can generate on-model visuals from a flat lay photo.
How do you make clothes look good in pictures without a model?
The key factors are garment preparation (steamed, lint-free, properly shaped), consistent lighting (soft, even, no harsh shadows), a clean neutral background, and the right method for the garment type. Structured garments look best with ghost mannequin or AI try-on; casual items work well as flat lays. Consistency across your catalog matters as much as any individual shot.
How do you photograph clothes on a hanger?
Hang the garment on a padded hanger against a plain wall or backdrop. Position a light source to the side (a window works well). Shoot at eye level with the garment's center, using a tripod for consistency. Steam the garment while it's hanging to remove wrinkles. Shoot front, back, and any key detail areas.
How do you make clothes look 3D without a mannequin?
The ghost mannequin technique creates a 3D worn appearance by compositing a garment-on-mannequin shot with an interior shot, then removing the mannequin in Photoshop. AI try-on tools achieve a similar result automatically — they generate a realistic worn shape from a flat product photo without any post-production work.
Can I take good product photos with just a phone and no studio?
Yes. A modern smartphone (iPhone 13 or newer, or equivalent Android) is sufficient for flat lay and hanger photography. The most important factors are lighting (natural window light is free and effective) and garment preparation. A $10 foam board as a reflector and a $30 handheld steamer will improve your results more than upgrading your camera.
What equipment is necessary for photographing clothing without a model?
The minimum setup: a smartphone or camera, a tripod, a clean white background (foam board or seamless paper), and a light source (window or softbox). For ghost mannequin photography, you'll also need a mannequin and Photoshop. For AI try-on, you only need the product photo and access to a tool like Koozee.
How do you take pictures of clothes to sell online?
For marketplace listings (Amazon, eBay, Shopify), the standard is a clean product image on a white background showing the full garment. Use flat lay or hanger shots for a quick catalog, ghost mannequin or AI try-on for a more professional result. Always shoot multiple angles (front, back, detail), ensure color accuracy in editing, and maintain consistency across all your product images.
Is AI try-on good enough for professional listings?
AI try-on has improved significantly and is now used by apparel sellers on Shopify, Amazon, and other marketplaces. Tools like Koozee are built specifically for apparel e-commerce and produce results that are suitable for product listings. As with any generated output, review before publishing — check that the garment fits naturally, colors are accurate, and fabric texture is preserved.
You May Be Interested

How to Photograph Clothes: 3 Proven Methods for Sellers

Flat Lay Clothing Photography: Complete Guide for Apparel Sellers

Amazon Product Photography for Clothing Sellers: 3 Methods 2026