Prompt Guide for Ecommerce: From Product Shots to Model Scenes with GPT Image 2.5
Want better ecommerce images without losing product consistency? This guide shows you a simple way to structure GPT Image 2.5 prompts for product shots, try-ons, model changes, and scene edits.


The hardest part of using AI for ecommerce imagery is not simply generating an attractive image. It is keeping the image anchored to the product you actually sell while changing the model, background, or visual presentation.
You may ask for a new environment and find that the product color changes with it. You may replace the model only to see the neckline or garment length shift. That is why ecommerce prompting should not rely mainly on words such as “premium,” “cinematic,” or “photorealistic.” The prompt needs to make the commercial task clear: what the product is, what the image is for, how the product should appear, and which details should remain stable.
GPT Image 2.5 improves reference-image fidelity, precision editing, and consistency across multiple edits, making it better suited to workflows that build on an existing product image.
This guide keeps the approach simple. Instead of covering every possible prompting technique, it focuses on the information that matters most when creating ecommerce product visuals.
How to Write Better Ecommerce Prompts with GPT Image 2.5
1. Product + Purpose: Start With What You’re Selling and What the Image Is For
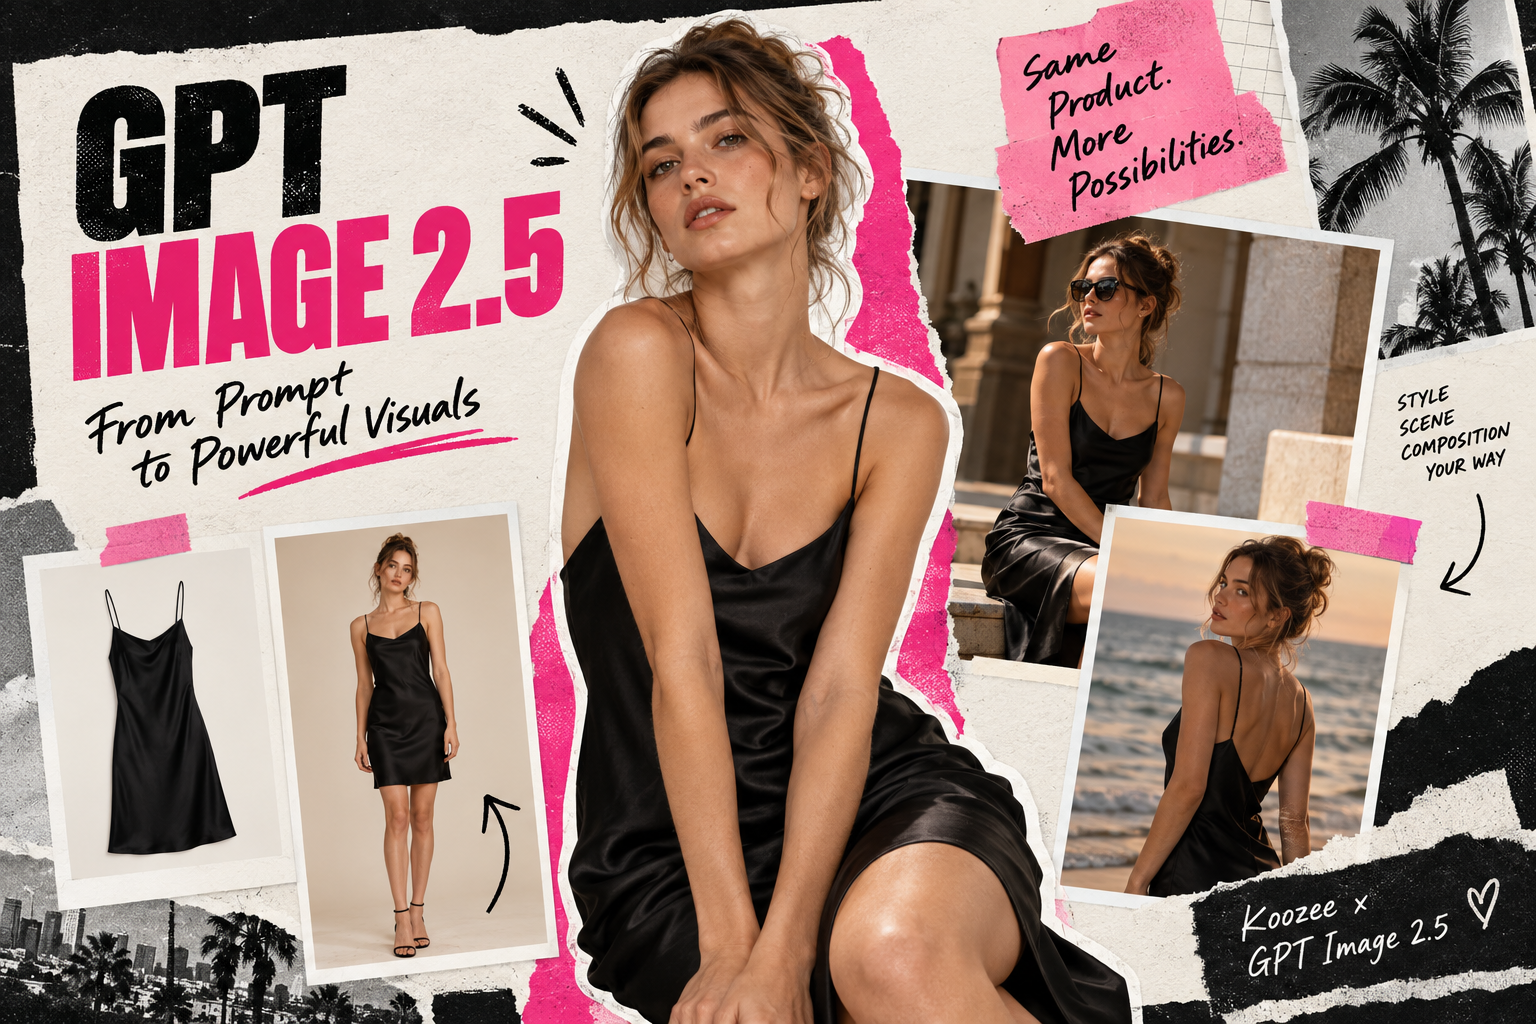
Do not begin by piling on style words. Start by telling the model what the product is and what job the image needs to perform.
For example:
Create a clean ecommerce product image using the uploaded black satin slip dress as the exact product reference.
If the goal is an on-model image instead, the instruction can become:
Create an ecommerce on-model image using the uploaded black satin slip dress as the exact garment reference.
Both prompts establish the uploaded garment as the visual anchor while also defining the intended output. That is more useful than simply asking for a “premium fashion image,” because a product image, an on-model shot, and a campaign visual have different commercial purposes and may require different compositions.
Define the product and purpose first. Add style afterwards.
2. Composition: Tell the Model How the Product Should Be Seen
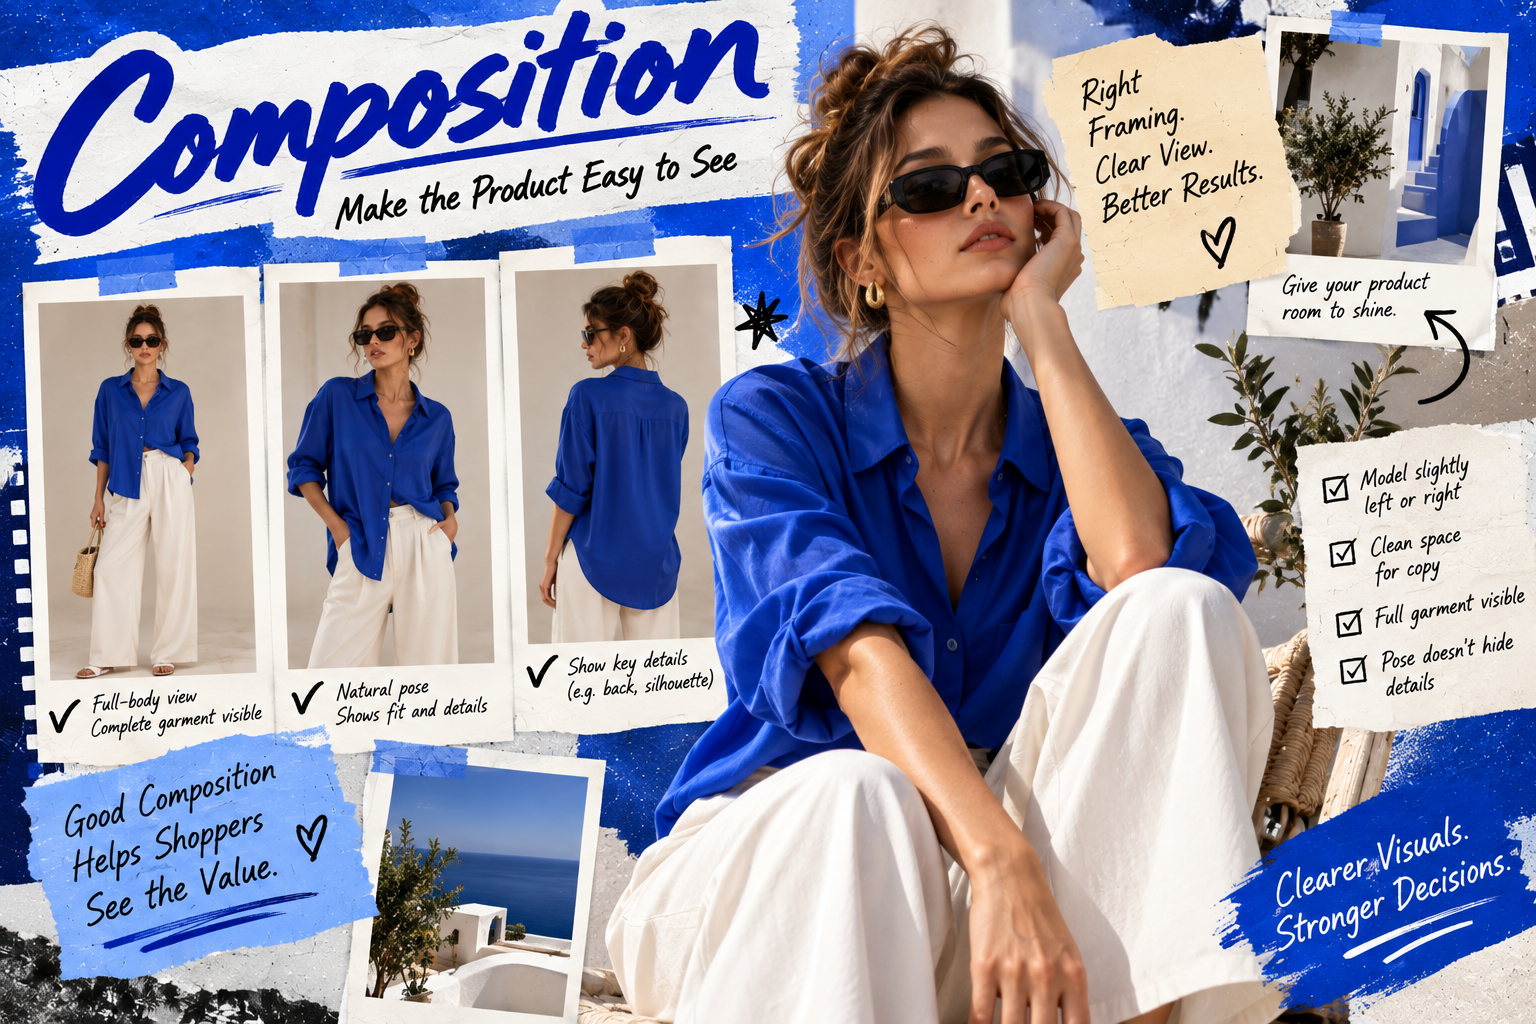
Once the product and purpose are clear, explain how the shopper should see the item. For a clean apparel product image, you might write:
Front-facing view, full garment visible, centered composition, with enough clean space around the silhouette.
For an on-model image:
Full-body framing, natural standing pose, with the complete garment clearly visible from neckline to hem.
If the image needs room for advertising copy:
Position the model slightly left of center and leave clean negative space on the upper right.
Camera angle, framing, and pose do not need to become separate prompting systems. They all support the same commercial objective: making the product easy to see and understand.
For apparel, pay particular attention to whether hands, hair, cropping, or exaggerated poses hide important garment details. A visually dramatic pose is not necessarily useful if shoppers can no longer see the neckline, waist, or full silhouette.
3. Scene + Lighting: Describe What the Image Looks Like, Not Just How It Feels
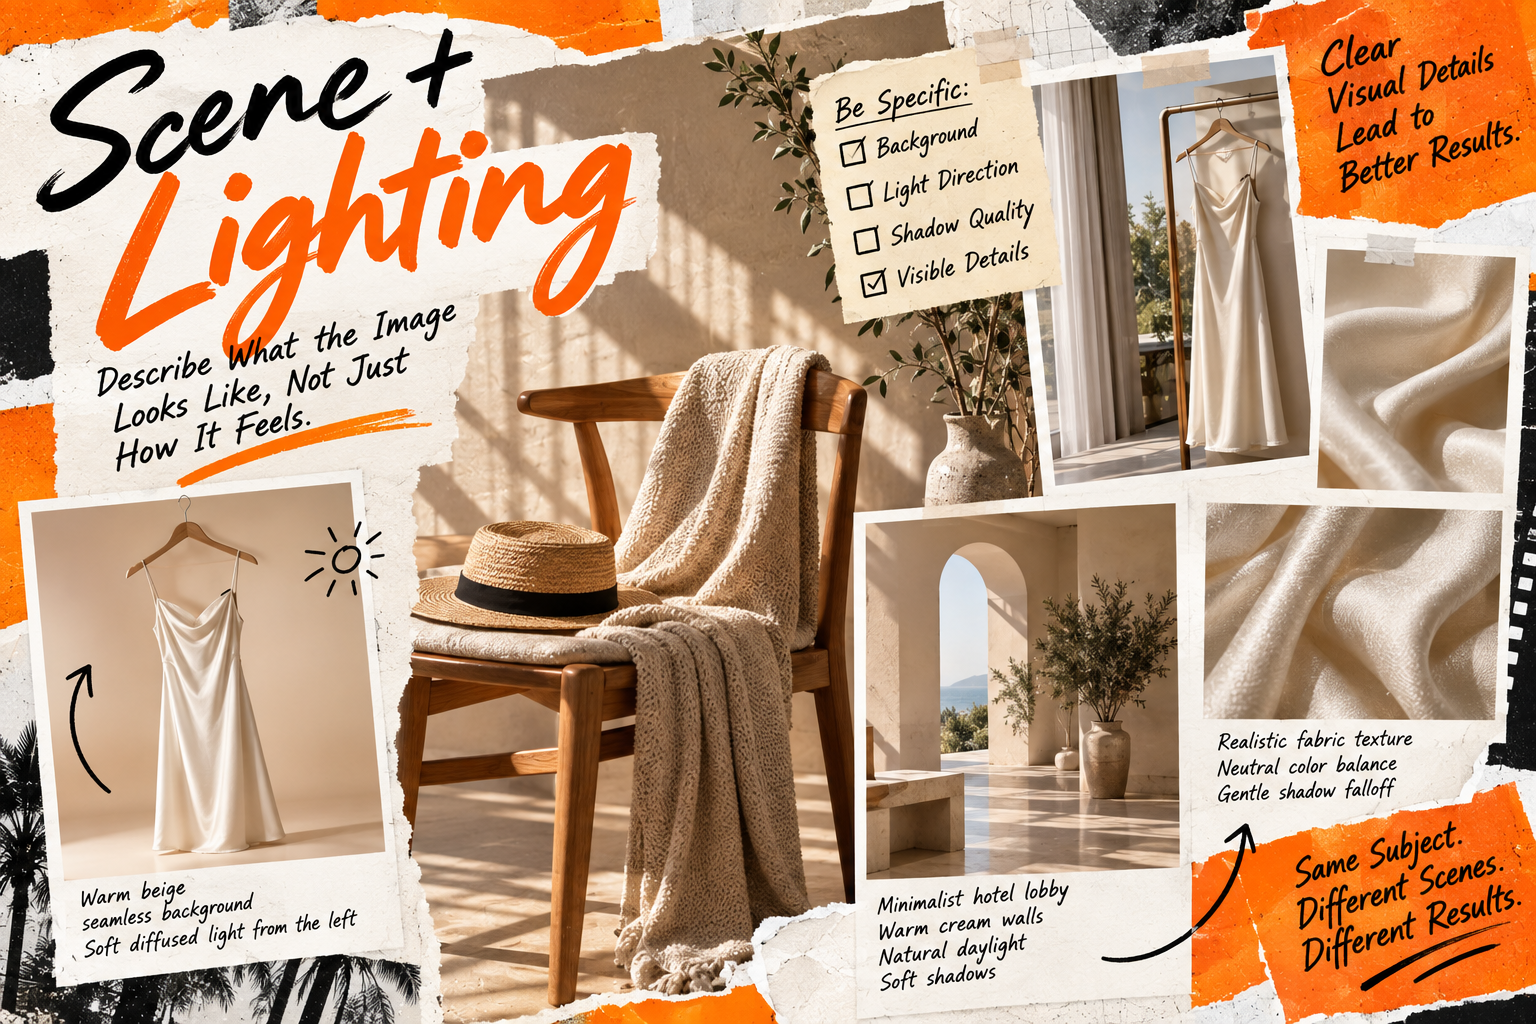
Terms such as “luxury background” and “premium setting” leave a lot of room for interpretation. If you already know the direction you want, describe the visible scene instead.
For example:
A warm beige seamless studio background with soft diffused side lighting and subtle natural shadows.
Or:
A minimalist boutique hotel lobby with warm cream walls, light stone flooring, and soft natural daylight.
The same applies to lighting. Instead of writing “professional premium lighting,” give the model something concrete:
Soft diffused light from the left, gentle shadow falloff, neutral color balance, and realistic fabric texture.
You do not need to write a photography textbook. The goal is simply to describe the background, light direction, shadow quality, and product texture clearly enough for the image to have a defined visual direction.
A useful test is to remove words such as “premium,” “luxury,” and “beautiful.” If you can still roughly picture the image, the prompt probably contains useful visual information.
4. Change + Keep: Define Both Sides of the Edit
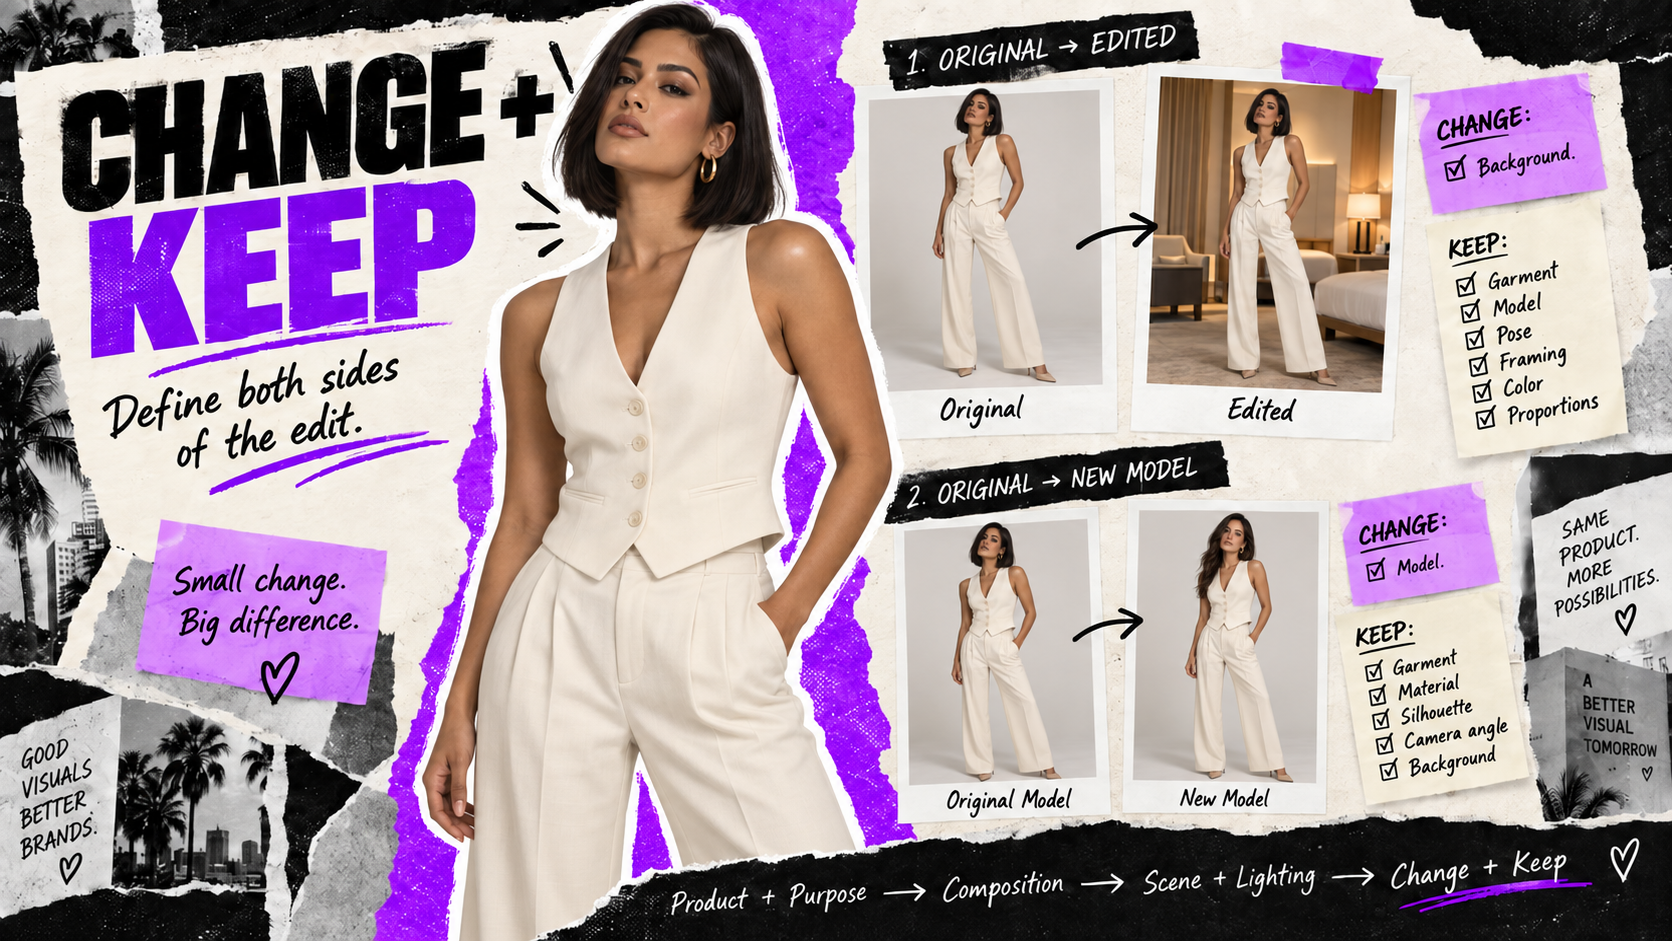
When working from a reference image, it helps to define not only what should change but also what should remain stable.
If you only want a new background:
Change: Replace the studio background with a minimalist hotel interior. Keep: Keep the garment, model, pose, framing, product colors, and proportions unchanged.
If you only want a different model:
Change: Replace the current model with a different adult model. Keep: Keep the garment, color, material, silhouette, camera angle, and background unchanged.
“Change / Keep” is not special GPT Image 2.5 syntax. It is simply a practical way to define the scope of an edit. This approach fits particularly well with Images 2.5 because OpenAI highlights its ability to make more focused edits while preserving surrounding subject details and composition more reliably.
You can also apply this approach directly to fashion visuals with GPT Image 2.5 in Koozee, using prompts to create or refine apparel images while keeping the product as the visual anchor.
The entire method can therefore be reduced to one line:
Product + Purpose → Composition → Scene + Lighting → Change + Keep
Start With One Garment: 4 GPT Image 2.5 Prompt Examples for Ecommerce
The prompts below are best treated as examples of task structure rather than guaranteed recipes. Results will vary depending on the reference image, product complexity, and source quality.
The more useful idea is the sequence behind them: Product → Try-On → Change Model → Change Scene
1. Start With the Product
Begin by establishing the garment itself before adding a model or a complex environment.
Use the uploaded black satin slip dress as the exact product reference.
Create a clean ecommerce product image with the garment fully visible and centered against a warm light-gray studio background.
Use soft diffused studio lighting and realistic satin texture.
Preserve the original black color, V-neckline, thin shoulder straps, hem length, and fitted silhouette. Do not redesign, recolor, shorten, or add new garment details.
The purpose of this step is simple: establish a stable product identity. If the garment is already inaccurate here, adding a model and a more elaborate scene will only carry that problem into later images.
Before moving on, check the basics: color, material, silhouette, neckline, length, and other important construction details.
2. Put the Garment on a Model
Once the product looks right, introduce the model.
Use the uploaded black satin slip dress as the exact garment reference.
Create an ecommerce on-model image featuring an adult female model in a relaxed natural standing pose.
Use full-body framing and keep the garment clearly visible from neckline to hem. Place the model in a clean warm-gray studio with soft diffused commercial lighting.
Preserve the original garment color, satin material, neckline, shoulder straps, fitted silhouette, and hem length.
The key principle is that the model is there to present the product. Complex poses, heavy styling, or hair covering the garment may create a more dramatic image while making the clothing harder to evaluate.
This is also central to Koozee’s apparel try-on positioning: on-model visuals are designed to help apparel sellers show how a garment looks when worn, rather than treating try-on primarily as fashion concept generation.
3. Change the Model, Keep the Garment
If the first try-on image works but you want to test another model, there is no need to rebuild the entire visual.
Change only the model.
Replace the current model with a different adult model with a natural commercial fashion appearance.
Keep the black satin dress exactly as it is, including its color, satin material, neckline, straps, hem length, and silhouette.
Keep the same pose, background, camera angle, framing, and lighting.
The main idea is easy to remember:
Change the model, not the garment.
Keeping the task narrow also makes it easier to create model variations for different audiences, markets, or campaign directions. Koozee similarly identifies model variation and visual localization as useful apparel-commerce scenarios.
4. Change the Scene, Keep the Product
Once the product and model work, make the environment the next variable.
Change only the environment.
Replace the studio background with a minimalist boutique hotel lobby featuring warm cream walls, light stone flooring, and soft natural daylight.
Keep the model, garment, pose, product details, framing, and overall proportions unchanged.
Keep the environment clean and free of distracting props.
The same principle can take an approved image from Studio → Street, Studio → Resort, or Studio → Campaign Scene.
The important skill is not collecting dozens of “best background prompts.” It is knowing which variable you are changing in the current turn.
Together, these four steps form a simple apparel ecommerce visual path:
Product → Try-On → Change Model → Change Scene
A few things are worth watching throughout the process:
Avoid changing too many variables at once
Replace vague words such as “premium” with visible details,
Explicitly state what should remain stable during reference-image edits,
Review the final image for product color, material, construction, logos, and human anatomy before publishing.
FAQs
How should I structure a GPT Image 2.5 prompt for ecommerce?
A practical structure is Product + Purpose → Composition → Scene + Lighting → Change + Keep. Define the product and image goal first, then add composition, environment, and lighting. When editing an existing image, make it clear what should change and what should remain stable.