Flat Lay Clothing Photography: The Complete Guide for Apparel Sellers
Learn how to do flat lay clothing photography for e-commerce — equipment, lighting, styling, camera settings, editing, and how to scale production with AI tools.


Whether you're listing products on Shopify, Amazon, or your own brand store, flat lay clothing photography is one of the most practical and cost-effective ways to present your apparel. No model booking. No studio rental. Just your product, a clean surface, and the right technique.
But "just lay it on the floor and shoot" is where most sellers go wrong. The difference between a flat lay that converts and one that gets scrolled past comes down to preparation, lighting, styling, and post-production — and for sellers managing dozens or hundreds of SKUs, it also comes down to workflow efficiency.
This guide covers everything you need to know: equipment, setup, styling, camera settings, editing, and how to scale flat lay production without burning out your team.
Key Takeaways:
Flat lay clothing photography means shooting garments from directly overhead on a flat surface — it's one of the most consistent and scalable product image formats for apparel e-commerce.
Preparation is everything: Steam or iron every garment before shooting. Wrinkles are the #1 reason flat lays look unprofessional.
Lighting matters more than your camera: Soft, even artificial light (5000K–5600K, CRI 90+) produces more consistent results than natural light for catalog-scale shooting.
For e-commerce sellers: Flat lays work best as a supporting image type alongside on-model visuals — buyers want to see both how the garment looks worn and how it's constructed.
AI tools can extend flat lay value: Once you have a clean flat lay image, AI platforms like Koozee can transform it into on-model try-ons, product videos, and listing-ready assets — without a separate photoshoot.
What Is Flat Lay Clothing Photography?
Flat lay clothing photography is a product photography technique where garments are arranged on a flat surface and photographed from directly above — typically at a 90-degree angle. The result is a clean, top-down view of the product that shows its shape, construction, fabric, and details without the need for a model or mannequin.
It's widely used in apparel e-commerce for:
Product listing images on Shopify, Amazon, eBay, and marketplaces
Catalog and wholesale lookbooks
Social media content (Instagram, Pinterest, TikTok)
Detail and secondary images on product pages
Flat lays are especially useful for showing garment structure — how a collar sits, how sleeves are cut, how a hem falls — in a way that on-model photos sometimes obscure.
Equipment You Need for Flat Lay Clothing Photography
If you choose to shoot your flat lays manually, you don't need a high-end studio, but a standardized setup is essential for catalog consistency. Here is the checklist of what you need:
Camera or Smartphone: Any modern DSLR, mirrorless camera, or recent flagship smartphone works. If using a camera, stick to a 50mm or 85mm lens to avoid barrel distortion.
Tripod with an Overhead Arm: Non-negotiable for manual shoots. A sturdy tripod equipped with a horizontal boom arm (or C-stand) keeps your camera locked at a perfect 90-degree angle, eliminating motion blur and perspective distortion.
Neutral Background: White seamless paper is standard for marketplaces (Amazon, eBay) as it's easy to edit, while light grey or off-white works well for Shopify stores to provide a slightly warmer feel.
Artificial Lighting: Skip natural light—it shifts constantly throughout the day, creating batch-editing nightmares. Instead, position two LED panels or softboxes at 45-degree angles on either side of your surface. Ensure your lights are daylight-balanced (5000K–5600K) with a CRI of 90+ to guarantee accurate fabric colors.
💡 Pro Tip: Always place a grey card in your test shot to lock in a custom white balance before you start. This simple step saves hours of color correction in post-production.
How to Do a Flat Lay Clothes Shoot: Step-by-Step
Step 1: Prepare Your Garments
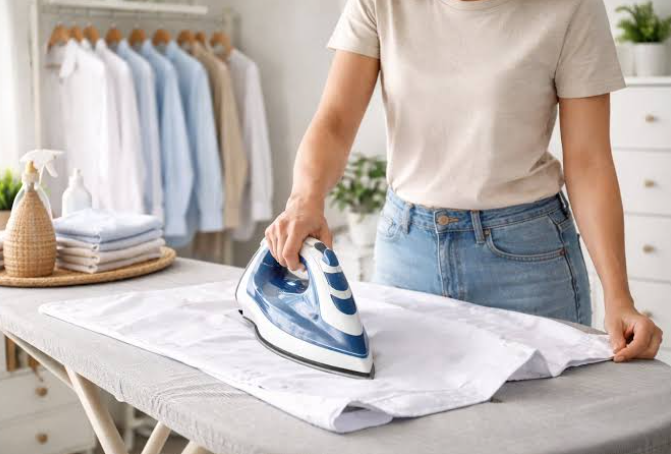
This is the most important step and the most skipped.
Steam or iron every garment before it goes on the surface. Wrinkles are the #1 reason flat lays look unprofessional — and they're nearly impossible to fix cleanly in post-production without distorting the fabric texture.
Lint-roll the garment to remove dust, pet hair, and loose threads.
Check for loose threads or defects that would be visible in the shot. Address them before shooting, not after.
Let steamed garments cool for 2–3 minutes before laying them flat. Hot fabric can stretch or distort when placed on a surface.
Step 2: Set Up Your Surface and Camera
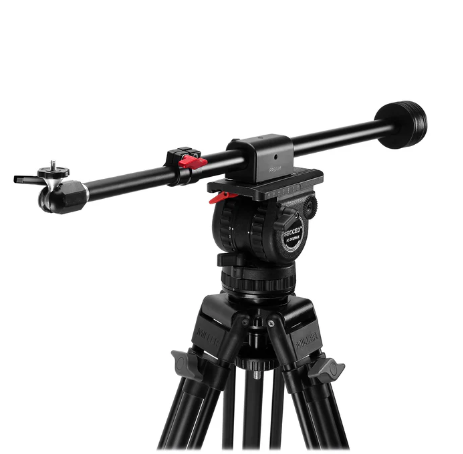
Lay your background material flat on a table or the floor. Tape down the edges to prevent curling.
Mark placement guides with tape or chalk on the surface. This ensures consistent garment positioning across every shot in the catalog.
Mount your camera overhead using a tripod with a boom arm. The camera should be directly above the center of the shooting area, lens pointing straight down.
Set your camera to manual mode for consistent exposure across shots.
Connect to a tethering app (Lightroom, Capture One, or a smartphone tethering app) so you can review composition on a larger screen without touching the camera.
Step 3: Style the Garment
Styling is what separates a flat lay that looks like a product from one that looks like a pile of fabric.
Center the garment on the surface, aligned with your placement guides.
Shape the silhouette: Fold or tuck sleeves, collars, and hems to clearly define the garment's shape. The goal is to communicate the cut and construction at a glance.
Add volume where needed: For tops and jackets, lightly stuff the shoulders and sleeves with tissue paper or foam to give them shape. Flat, deflated sleeves make garments look smaller and less appealing.
Smooth the fabric surface: Run your hand across the garment to remove any surface creases or bunching.
Check symmetry: Step back and look at the overall composition. Is the garment centered? Are both sides balanced?
💡 Pro tip for how to do a flat lay clothes shoot at scale: Create a styling guide for each garment category (tops, bottoms, outerwear, dresses) with reference photos showing the correct fold positions and sleeve angles. This lets different team members produce consistent results without re-briefing every session.
Step 4: Set Your Camera Settings
| Setting | Recommended Value | Why |
| Aperture | f/8–f/11 | Maximizes depth of field; keeps entire garment in sharp focus |
| ISO | 100–400 | Minimizes noise; use the lowest ISO your lighting allows |
| Shutter speed | 1/125s or faster | Eliminates any vibration blur |
| White balance | Custom (grey card) | Ensures accurate color across the batch |
| Focal length | 50mm–85mm | Avoids distortion; flatters garment proportions |
Step 5: Shoot and Review
Take a test shot and review it on your tethered screen or camera LCD.
Check for: even lighting (no hot spots or shadows), sharp focus across the full garment, correct color balance, and clean background.
Adjust and reshoot if needed before moving to the next garment.
Shoot multiple angles if your product page requires them: full garment, detail shots (collar, cuffs, hem, fabric texture), and any branded labels or hardware.
The Efficiency Shortcut for High-Volume Sellers: AI-Powered Flat Lays
For e-commerce brands managing dozens or hundreds of SKUs, traditional flat lay setups are an operational bottleneck. Balancing exposure, taping down placement guides, and matching shadow baselines across different batches takes hours of manual labor.
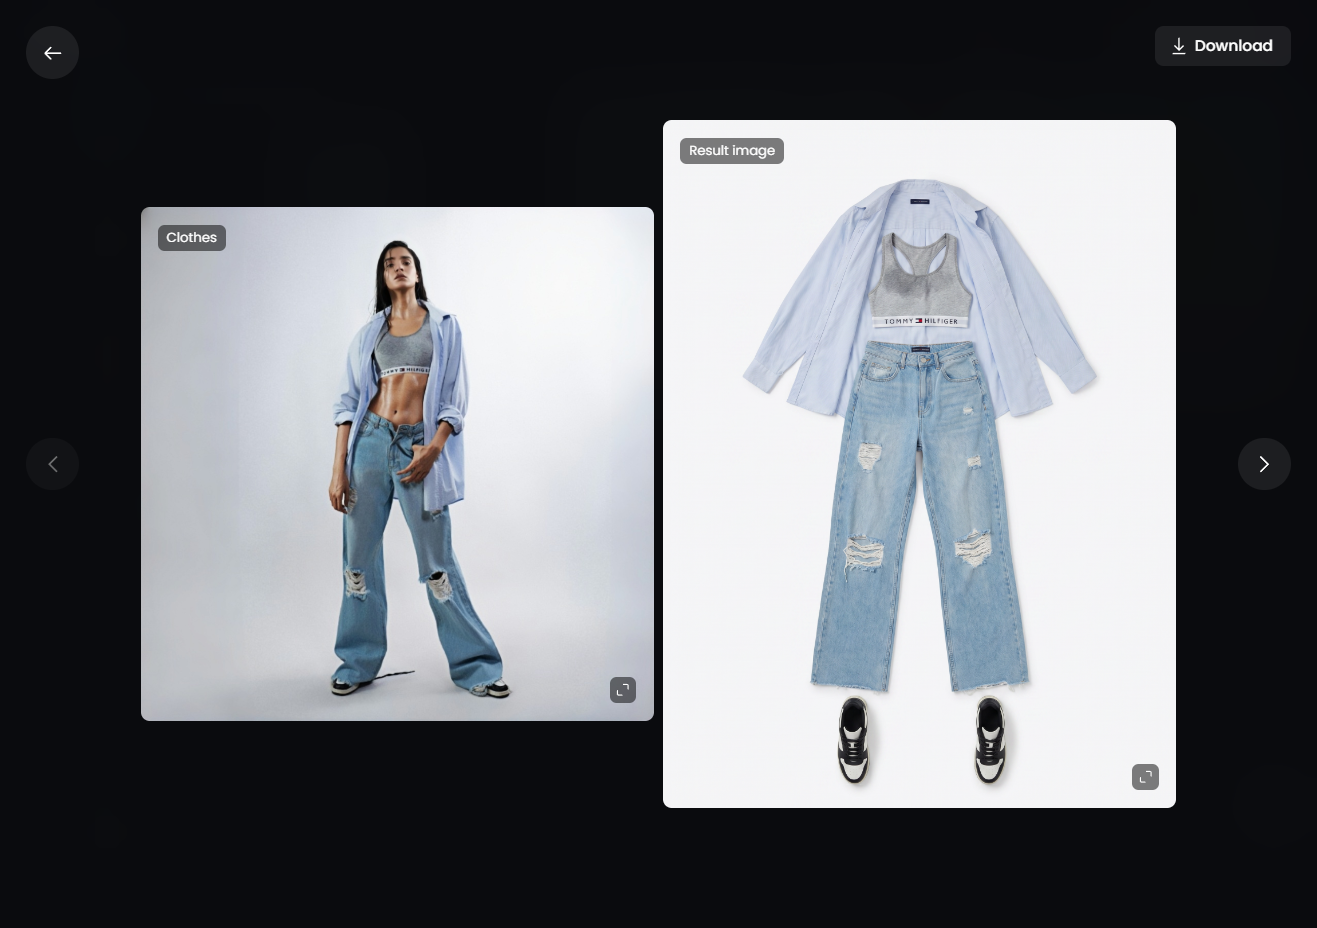
If you want to skip the physical overhead setup entirely, AI visual platforms like Koozee offer a frictionless alternative. With Koozee's dedicated AI Flat Lay Clothes Tool, you can transform raw, casual garment photos into clean, standardized, studio-quality flat lays on a crisp white background within seconds.
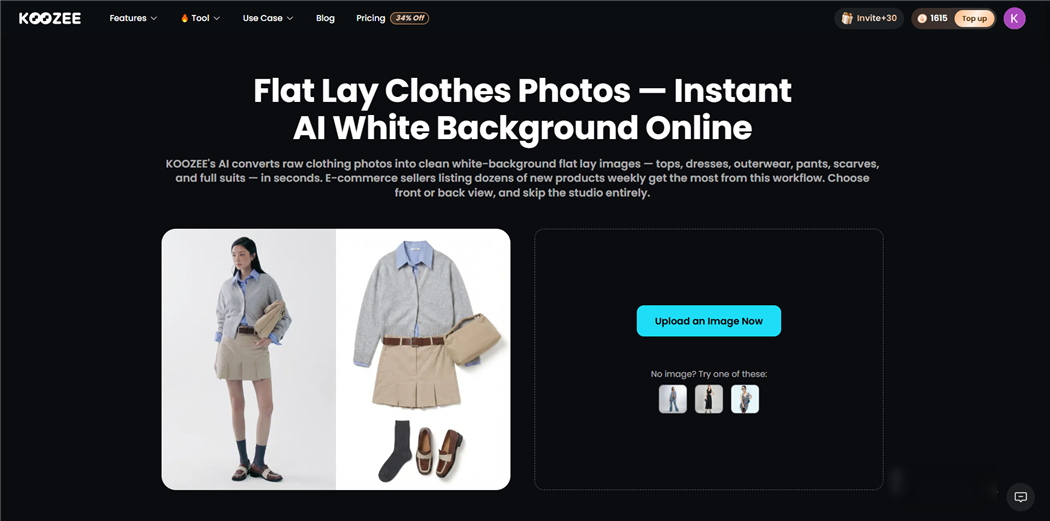
All-Apparel Compatibility: Seamlessly processes tops, dresses, outerwear, pants, suits, and even accessories like scarves.
Dual-Angle Control: Easily choose between front or back views to capture the exact cut and construction of your garment.
Zero Studio Overhead: Eliminate the need for professional photographers or complex lighting grids, moving your scaling workflow entirely to the cloud.
Done in 3 Simple Steps: From Raw Photo to Listing-Ready Asset
Koozee eliminates all the manual labor of stretching fabric, setting up stands, and batch-editing:
Step 1: Upload Your Photo
Drag and drop your image (JPEG, PNG, WebP). Hanger shots, mannequin photos, or casual snapshots work perfectly—no pre-cropping needed.
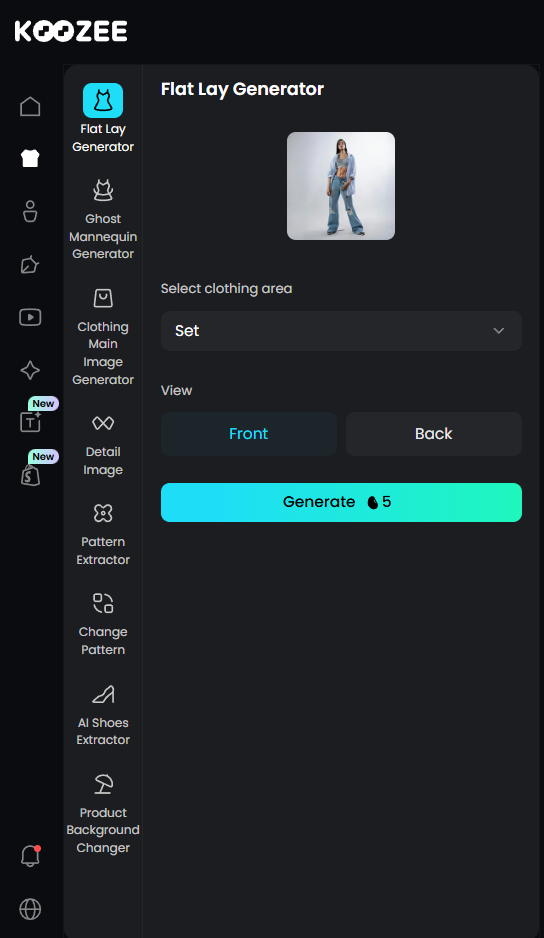
Step 2: Choose Category & Angle
Select your item type (tops, dresses, pants, etc.) so the AI maps the perfect silhouette. Then, simply toggle between Front or Back View.
Step 3: Export & List
Your studio-grade, pure white background flat lay is ready in seconds. Download individually or batch-export an entire collection directly to Shopify or Amazon.
Quick Styling & Lighting Tips for Better Flat Lays
If you are shooting manual flat lays for social media or lookbooks, use these quick guidelines to elevate your visual quality without overcomplicating your workflow:
Use Props Intentionally: Keep props secondary so the garment remains the visual anchor. Use minimalist accessories (sunglasses, bags) or branded packaging that match your brand aesthetic.
Group Outfits for Storytelling: Arrange multiple garments together naturally (top, bottom, shoes) with consistent spacing. This helps buyers visualize a complete look and increases average order value.
Match Background Contrast: Place light garments on slightly off-white or textured backgrounds for subtle separation, dark garments on charcoal surfaces to highlight fabric texture, and bright items on neutral grey or white.
Go Artificial for Scale: While natural window light works for quick lifestyle snaps, it is too inconsistent for high-volume catalogs. Use dual artificial softboxes to maintain identical color temperatures across every batch and eliminate shadows.
⚠️ Warning: Never mix natural and artificial light in the same session. Doing so creates harsh color casts that make accurate fabric color correction nearly impossible in post-production.
Post-Production: Editing Flat Lay Clothing Photos
If you shoot your flat lays manually, every image requires a quick run through editing software to ensure it looks professional and complies with platform requirements:
Color Correction: Use your grey card test shot to sync white balance, exposure, and contrast across the entire batch in Lightroom or Capture One.
Background Cleanup & Retouching: For Amazon or eBay, use Photoshop's Select Subject tool to isolate the garment and drop it onto a pure white background (RGB 255, 255, 255). Use the Healing Brush conservatively to remove any remaining fabric wrinkles.
Crop & Export: Crop your images to match your platform's requirements—typically a 1:1 square ratio for Amazon main images and eBay, or 1:1 / 4:5 for Shopify and Instagram. Export at a minimum of 1000px (or 2000px+ for Amazon's zoom feature).
Common Flat Lay Clothing Photography Mistakes to Avoid
| Mistake | Why It Hurts | Fix |
| Skipping steaming/ironing | Wrinkles dominate the image; product looks low-quality | Steam every garment before shooting |
| Shooting handheld overhead | Inconsistent angles; distortion | Use a tripod with overhead boom arm |
| Mixed light sources | Color casts; inaccurate fabric color | Use one light source type only |
| No placement guides | Inconsistent positioning across catalog | Mark surface with tape guides |
| Over-propping | Props distract from the product | Keep props minimal and secondary |
| Shooting at wide focal lengths | Barrel distortion makes garments look misshapen | Use 50mm or longer |
| Skipping tethering | Miss composition issues until post-production | Tether to a screen for real-time review |
FAQ
What is flat lay clothing photography?
Flat lay clothing photography is a technique where garments are arranged on a flat surface and photographed from directly above (90-degree angle). It's widely used in apparel e-commerce to show garment construction, fabric, and details in a clean, consistent format.
How do I make flat lay photos look professional?
The biggest factors are preparation (steam every garment), lighting (soft, even artificial light), camera stability (overhead tripod mount), and consistent styling (placement guides, shaped silhouettes). Post-production color correction and background cleanup complete the professional look.
Do I need a professional camera for flat lay clothing photography?
Not necessarily. A modern smartphone (iPhone 14 Pro or newer, Samsung Galaxy S series) can produce usable flat lay images for e-commerce. For catalog-scale shooting or marketplace listings that require high-resolution images, a DSLR or mirrorless camera with a 50mm lens will produce more consistent, higher-quality results.
Should I use natural light or artificial light for flat lay photography?
Artificial light is recommended for catalog-scale e-commerce shooting. It's consistent, controllable, and makes batch editing significantly faster. Natural light works for small-scale or lifestyle content but is inconsistent across the day and difficult to replicate session to session.
Is a flat lay enough for a clothing product page?
For most apparel e-commerce, flat lays work best as supporting images alongside on-model photos. Buyers want to see both how the garment is constructed (flat lay) and how it looks when worn (on-model). AI tools like Koozee can generate on-model try-on visuals from a flat lay image, making it practical to produce both formats without a separate model shoot.
How do you style clothes for a flat lay?
Steam the garment first, then center it on your surface using placement guides. Shape the silhouette by folding sleeves and collars to define the garment's cut. Add light stuffing (tissue paper or foam) to shoulders and sleeves for volume. Smooth the fabric surface and check symmetry before shooting.
What background color is best for flat lay clothing photography?
White or light grey is the most practical choice for e-commerce listings — it meets most marketplace requirements, shows true garment color, and is easy to batch-edit. Textured surfaces (linen, wood) work well for lifestyle and social content but are harder to keep consistent across a catalog.
What to Do Next
Flat lay clothing photography is a skill that compounds. The more you shoot, the faster your setup becomes and the more consistent your results get.
If you're building out a full product image workflow — flat lays, on-model images, product videos, and listing assets — Koozee is worth exploring. It's built specifically for apparel sellers and connects directly to Shopify, so you can generate listing-ready visuals from your existing product images without managing a separate photoshoot for every format.